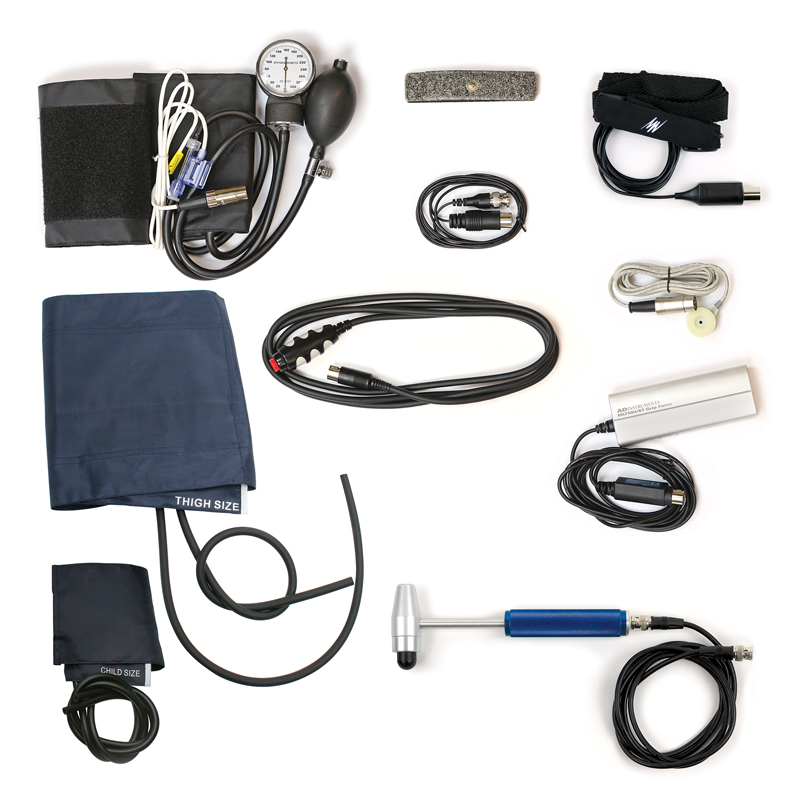
Teach your students a lesson they’ll never forget with the Diving Response Lab. Engage students with this truly immersive and active learning activity that lets students experience the bradycardia associated with the human diving response first-hand, by recording and analyzing their own biological signals. This activity examines how leg volume changes after a blood pressure cuff is removed.
Experimental Protocol
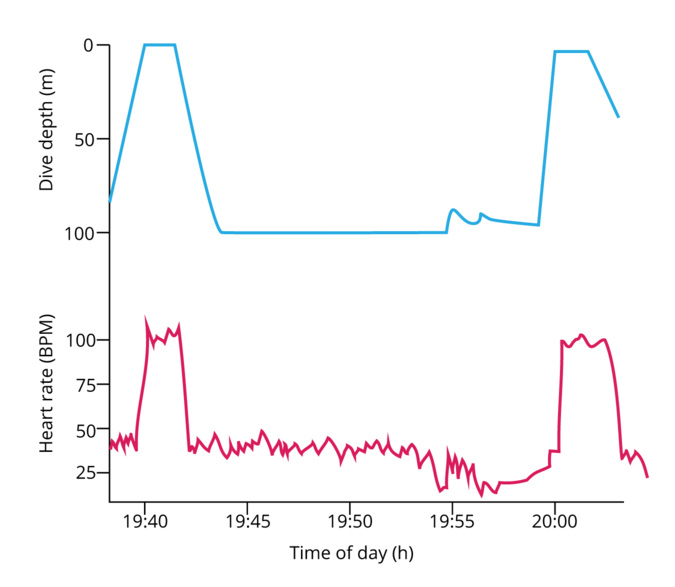
This hands-on lab experiment is a great way for life science educators to teach general principles of physiology, experimental design, and data analysis. Students investigate the effects of the diving response on their heart rate and peripheral circulation during simulated dives. First, students will examine the changes in their own heart rate when they hold their breath. Then they will examine the effect on the heart rate of a simulated dive (brachycardia), and finally they will examine the effects of dive simulation on peripheral circulation.
Using PowerLab 26T
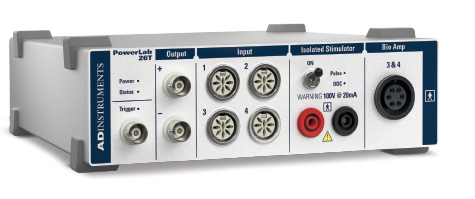
Here are the steps for setting up and running this classic experiment…
- Step 1: Identify learning objectives
- Step 2: Set up your equipment to record signals
- Step 3: Perform Breath-hold and heart rate activity
- Step 4: Perform dive simulation activity
- Step 5: Perform dive simulation and circulation activity
Step 1: Identify learning objectives
By the end of this lab students will be able to do the following:
- Describe the physiological changes seen in the diving response.
- Describe the physiological effects of breath holding.
- List physiological differences between breath holding and diving.
- Discuss the physiological implications of the diving response.
Step 2: Set up your equipment to record signals
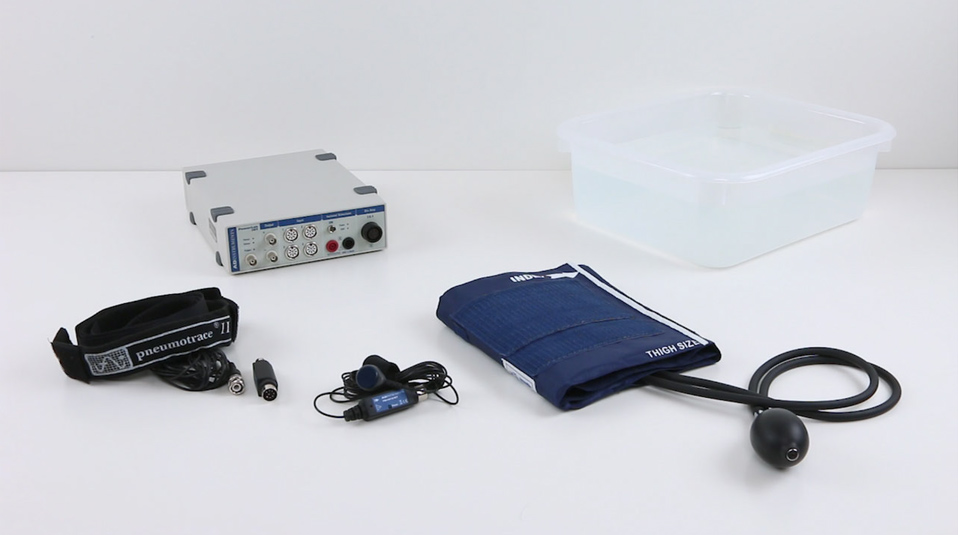
Data acquisition hardware used: PowerLab 26T
Data analysis software used: Lt: Life Science teaching software / LabChart
Set up your equipment to record signals
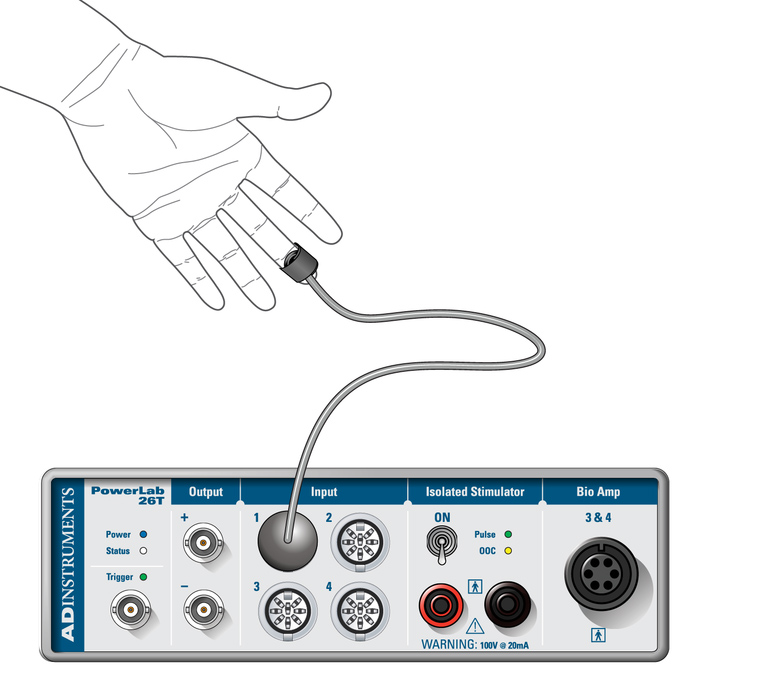
- Make sure your data acquisition device is connected to your computer and turned on. We are using the PowerLab 26T for data acquisition.
- Connect the finger pulse transducer to the correct input on your device. (Input 1 on the PowerLab.)
- Attach the finger pulse transducer to a middle finger.

Finger pulse transducers are often very sensitive to movement. The volunteer should try to keep the finger still when recording data.
Step 3: Perform breath-hold activity
The question here is: "What is the effect of breath holding on heart rate and peripheral circulation under normal conditions?"
Procedure
- Set your data analysis software to record average pulse rate and amplitude.
- Fill a tub with cool water (10–15°C, 50–60°F) and monitor the water temperature with a thermometer. If required, use ice to chill the water.
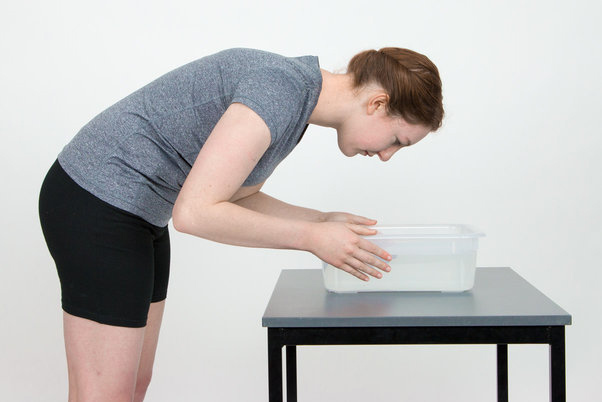
- Position the volunteer as shown above, with the face just above the water's surface. The volunteer should remain motionless.
- Select Start on your data analysis software to begin recording average pulse rate and amplitude. Record the volunteer's resting pulse for 30 s. Note this section on the recording as “Resting”.
- After 30 s, ask the volunteer to take a deep breath, exhale partially, and then hold the breath. The volunteer should remain in position just above the water. Note this section on the recording as “Breath holding”.
- Record for a minimum of 30 s while the volunteer is breath holding. One member of the group should tap the volunteer on the back at 10 s intervals to help keep track of the time and prevent anxiety.
- After 30 s tell the volunteer to resume breathing. Make sure the volunteer remains still. Note this on the recording as “Recovery”.
- After 30 s, stop the recording.
Analysis
Here, students examine how breath holding affects pulse rate and amplitude.
- On the recording, select a representative 5 s after the "Resting" comment. Note the average pulse rate and amplitude.
- Repeat for the first 5 s of breath-hold.
- Repeat for the last 5 s of breath-hold.
- Repeat for a representative 5 s at the end of recovery.
Step 4: Perform dive simulation activity
The question here is: "What is the effect of breath holding on heart rate and peripheral circulation during a simulated dive?"
Procedure
- Ensure your data analysis software is recording average pulse rate and amplitude.
- Ask the volunteer to stand in front of the tub, bent over so that the face is just above the water's surface, and remain motionless.
- Select Start on your data analysis software to record. Note this on the recording as “Resting”.
- After 30 s, ask the volunteer to take a deep breath, exhale partially, then hold his or her breath and immerse their face up to the cheeks in the tub of water. Note this on the recording as “Dive”.
- Record for a minimum of 30 s while the volunteer is submerged. One member of the group should tap the volunteer on the back at 10 s intervals to help keep track of the time and prevent anxiety. Do not force the volunteer to remain submerged if he or she is not comfortable!
- After 30 s tell the volunteer to surface, and return to the original position with their face just above the water surface. Make sure the volunteer remains still to minimize movement artifacts. Note this on the recording as “Recovery”.
- After 30 s stop the recording.
Analysis
Here students examine how a "dive" affects pulse rate and amplitude.
- On the recording, select a representative 5 s after the "Resting" comment.
Note the average pulse rate and amplitude. - Repeat for the first 5 s of breath-hold.
- Repeat for the last 5 s of breath-hold.
- Repeat for a representative 5 s at the end of recovery.
Ask some questions to check student’s understanding
Here are some questions you could ask your students to test their understanding:
- Did you observe any changes in heart rate during and after the simulated dive?
- Describe any changes in pulse amplitude you observed during the simulated dive. Explain why these changes occurred.
- Compare the effects of diving and breath holding on pulse rate. Were they the same?
- How long did the diving response take to occur? How quickly did the heart rate return to normal after a dive?
- What environmental factors could explain differences between breath holding and a "dive"?
- Compare the changes in heart rate during dives among the members of other groups. Is the effect between individuals similar?
Step 5: Perform dive simulation and circulation activity
The question here is: "Does peripheral blood flow change during the dive response?"
Many changes in cardiovascular function occur during the diving response. In this activity students use an indirect method to detect changes in peripheral blood flow. They will investigate the effects of venous occlusion to the leg by applying a thigh blood pressure (sphygmomanometer) cuff to occlude the venous return of blood from the leg, and then removing it to measure changes in leg volume with a respiratory belt transducer.
Equipment setup
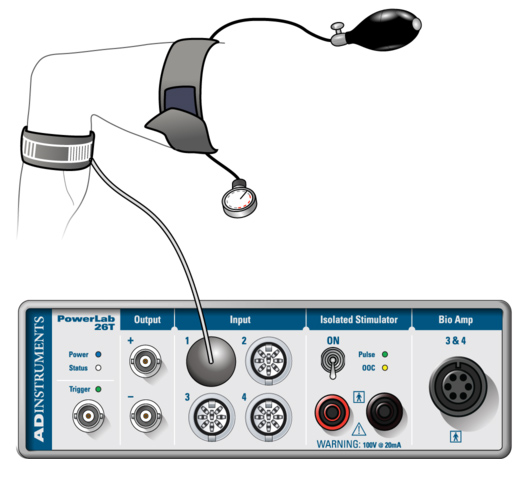
- Remove the finger pulse transducer from the volunteer, and disconnect it from your hardware.
- Place the respiratory belt transducer around the calf. The belt should be tight enough to be under tension.
- Connect the respiratory belt transducer to your recorder. (Connect to Input 1 on the PowerLab 26T.)
- Place the sphygmomanometer cuff around the volunteer's thigh. If necessary, supplement the Velcro fastening with some duct tape.
- Practice inflating and rapidly deflating the sphygmomanometer cuff as follows:
- Inflate the cuff rapidly to 60 mmHg, and maintain this pressure for 30 s.
- Instruct the volunteer to grasp the cuff's Velcro flap, and unfasten it to release the pressure suddenly.
- Release the thumb valve on the rubber bulb, and squeeze all the air out of the cuff before putting it on again.

Both the sphygmomanometer cuff and the respiratory belt transducer can be placed over clothing.
Procedure
This activity examines how leg volume changes after a blood pressure cuff is removed.

Students will perform three protocols:
1. Control with normal breathing - Control Protocol
2. During a simulated dive - Dive Protocol
3. During breath holding alone - Breath-Hold Protocol
- Set your analysis software to record leg volume in arbitrary units (au).
- Place the blood pressure cuff around the volunteer's thigh.
- Ask the volunteer to stand in front of the diving tub, bent over so that the face is just above the water's surface, and remain motionless.
- Call this recording “Control Protocol".
- Begin recording on your data analysis software. Note this section of the recording as “Resting”.
- Inflate the blood pressure cuff rapidly to 60 mmHg. Tighten the valve to maintain this pressure for the 30 s protocol. Note this section of the recording as “Cuff Inflated”.
- 20–25 s into the protocol, the assistant should rapidly remove the cuff. The volunteer should stay still and remain in the same position. Note this section of the recording as “Cuff Removed”.
- 30 s into the protocol, the volunteer should stop the protocol. His or her face should remain just above the water's surface.
- Note this section of the recording as “Recovery” . Record for 10 more seconds, then stop the recording.
- Release the valve and squeeze the air out of the cuff.
Repeat steps 1–10 for the remaining 2 protocols, naming the relevant recording "Dive Protocol" and "Breath-Hold Protocol".
Analysis
Here students will analyze the effects of venous occlusion to the leg.
- Look at the "Control Protocol" recording.
- Mark the point where the cuff is ripped off the leg, and place your point selector at the point of maximum deflection.
- The leg volume will be shown in arbitrary units (au).
- Repeat steps 1–3 for:
- Dive Protocol
- Breath-Hold Protocol
Ask some questions to check student’s understanding
Here are some questions you could ask your students to test their understanding:
- Do your results for leg volume suggest that peripheral circulation changes during a "dive"?
- Do your results for leg volume suggest that peripheral circulation changes during a breath-hold?
- Based on your data, describe the potential advantages and disadvantages of the diving response. What other factors should be accounted for during a real dive that were not simulated in this activity?
We hope this guide will help you run a memorable, active, and engaging experiment or lab for your students!
Teaching Physiology, Medicine, or Nursing?
Check out our Human Physiology Kit
