You can use the ECG and heart rate preset settings together with a PowerLab with an inbuilt Bio Amp to record a volunteer's ECG and heart rate. Ask the volunteer to relax and keep still to avoid any movement artifacts.
Exercises you can do using these settings
- Record a standard (3 electrode or "5 lead") ECG and identify the major components in the ECG: the P wave, QRS complex, and T wave.
- As an optional exercise, you can perform a 12 lead ECG similar to those carried out in hospitals to diagnose heart conditions; a 12 lead ECG provides 12 different views of the heart. [Note: To perform the 12 lead ECG exercise, an ECG 12 Lead Selector Box is required].
The following instructions may be useful for you to copy and paste for your students:
Equipment setup procedure
Standard ECG
- Make sure the PowerLab is connected and turned on.
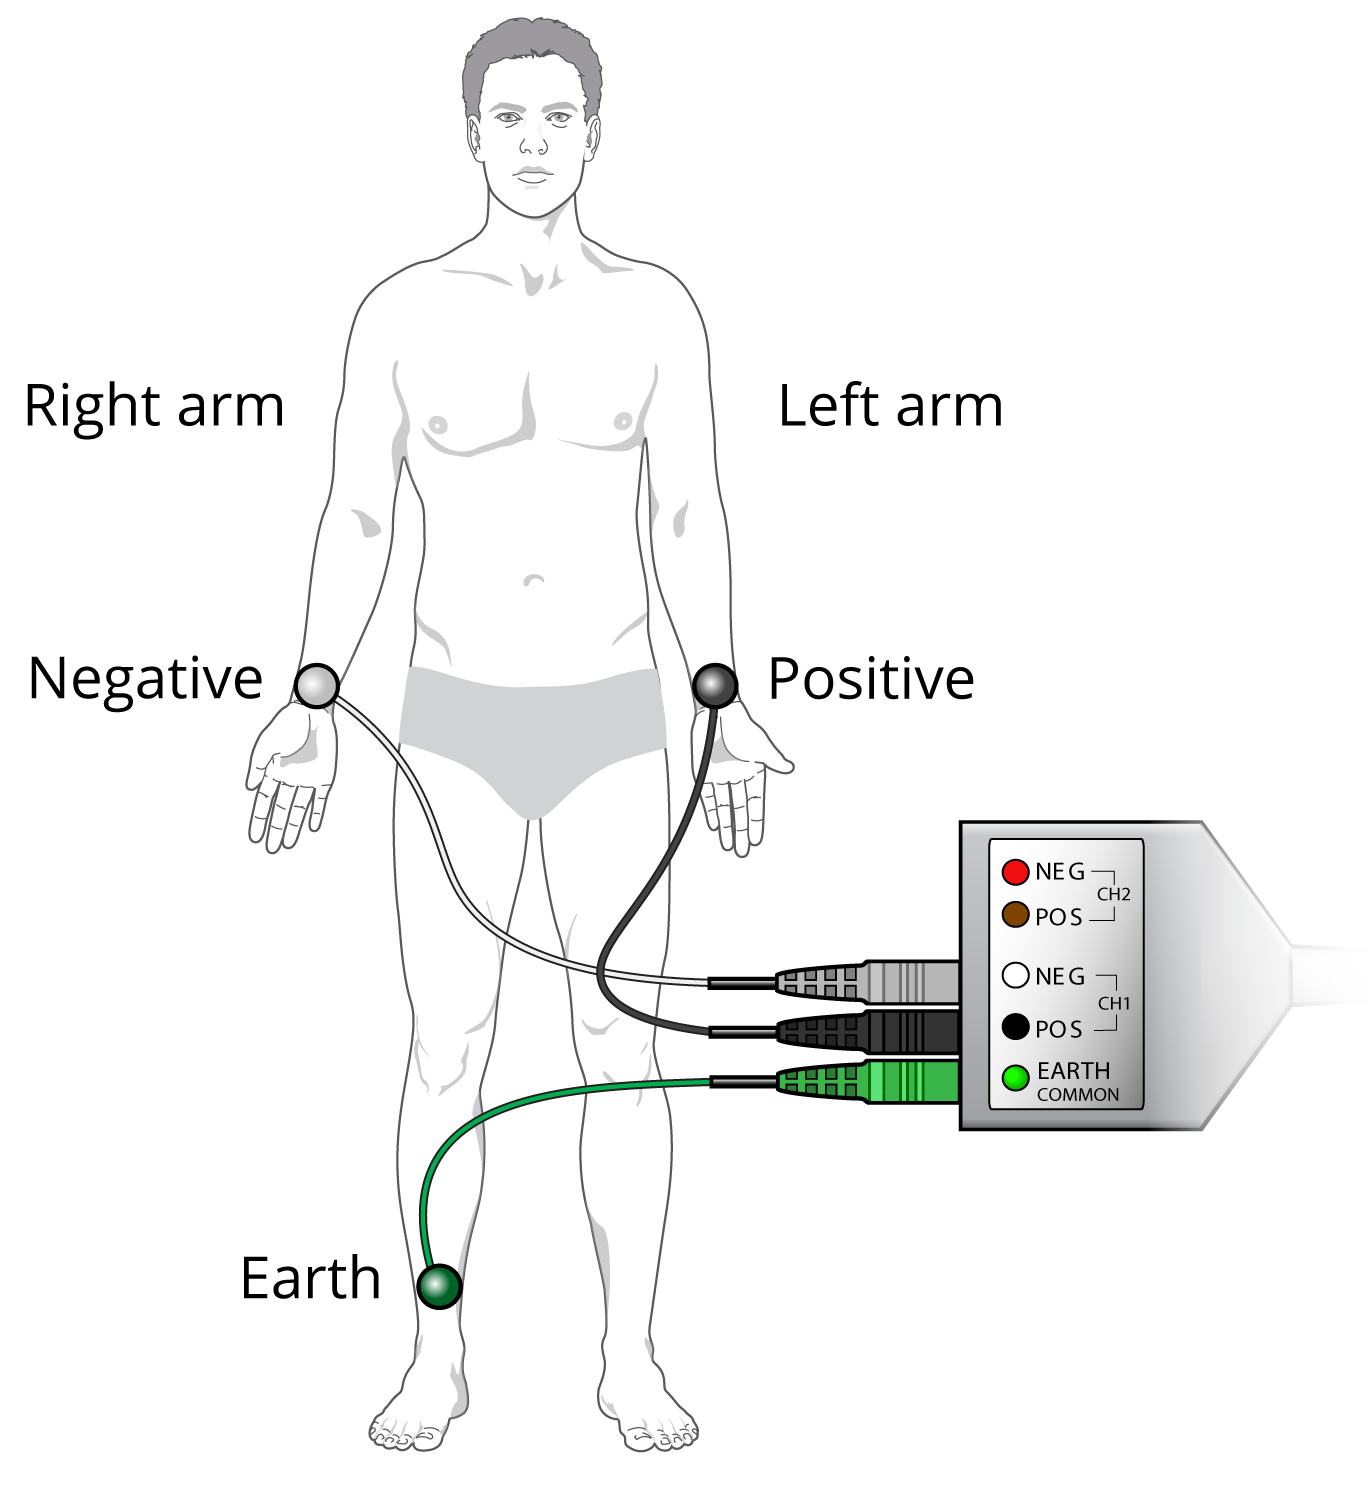
- Connect the electrode lead wires to Earth, CH1 NEG, and CH1 POS on the Bio Amp cable.
- Connect the Bio Amp cable to the Bio Amp input on the PowerLab.
- Attach ECG electrodes as described below.
Attaching ECG Electrodes
- Remove any watches and/or jewelry from the volunteer's wrists and ankles.
- Using a pen, mark each point on the volunteer's skin where electrodes will be placed (i.e. both wrists and the right leg). Lightly abrade the skin with abrasive gel, then clean the area with alcohol swabs.
- Snap the lead wires onto disposable electrodes.
- Attach the electrodes to the prepared areas on the volunteer's skin. The positive electrode should go to the left wrist, the negative electrode to the right wrist, and the ground electrode to the right leg.
12 lead ECG
- Remove any watches and/or jewelry from the volunteer's wrists and ankles.
- Make sure the PowerLab is connected and turned on.
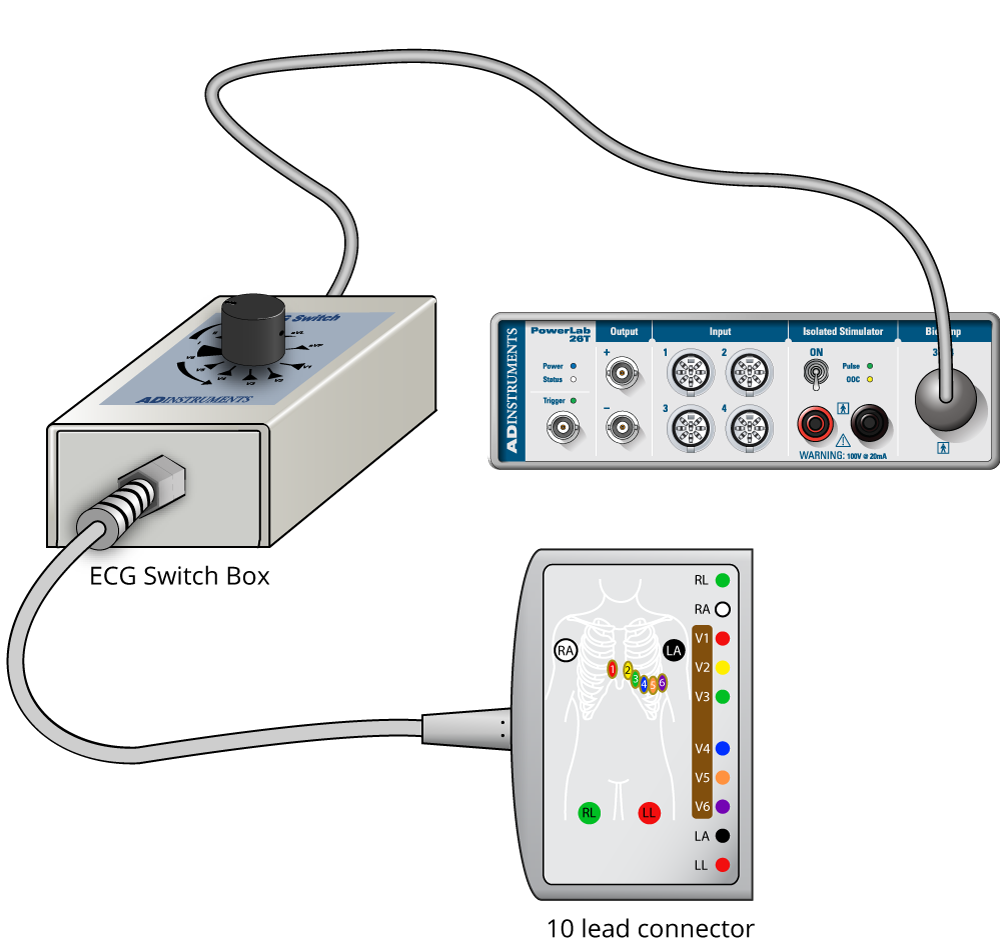
- Connect the electrode lead wires to RL, RA, V1–V6, LA, and LL on the 10 lead connector (the electrodes and plugs are labeled and color coded). Note: Some leads share the same color coding (e.g. green for RL & V3, red for V1 & LL). Make sure you have attached each lead to the correct plug.
- Connect the Lead Selector Box to the Bio Amp input on the PowerLab.
Placement of the limb leads
- Use a pen to mark a small cross on the volunteer's skin where electrodes will be placed (i.e. both wrists and ankles, and across the chest). Lightly abrade the skin with abrasive gel and clean the area with alcohol swabs.
- Attach disposable electrodes to the prepared areas on the volunteer's skin. Attach the limb leads:
- RL – right leg
- RA – right arm
- LA – left arm
- LL – left leg
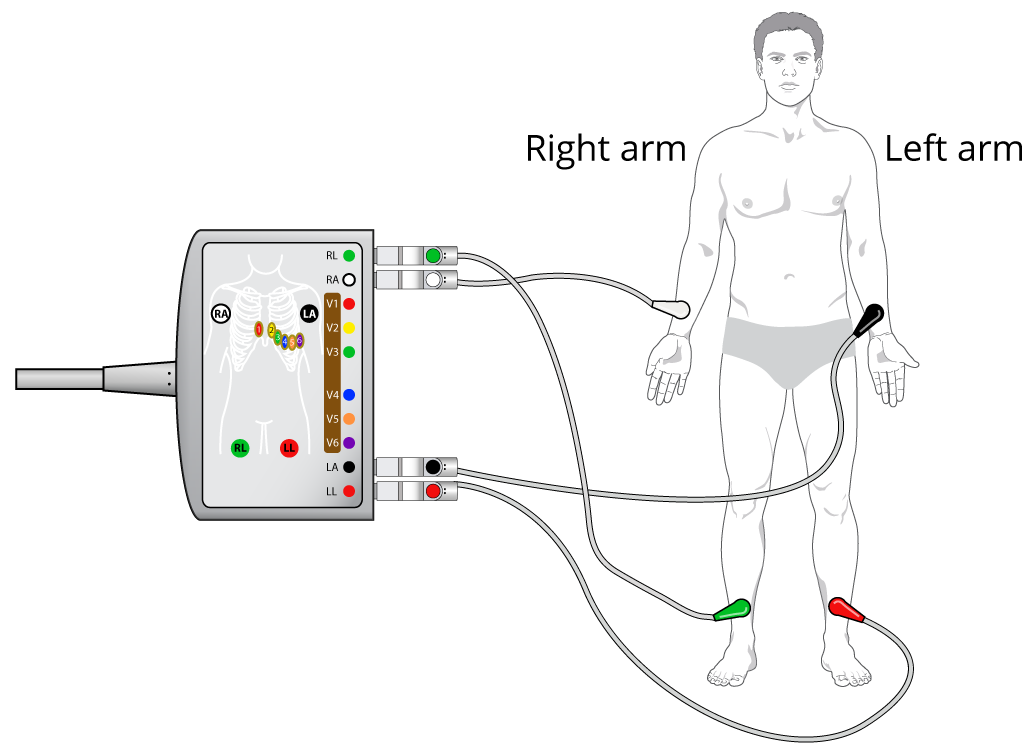
Placement of the precordial leads to the chest electrodes
- Locate the volunteer's right clavicle. Feel the space below the clavicle, just below the first rib. This is the first intercostal space.
- Work your way down the chest, counting the ribs as you go.
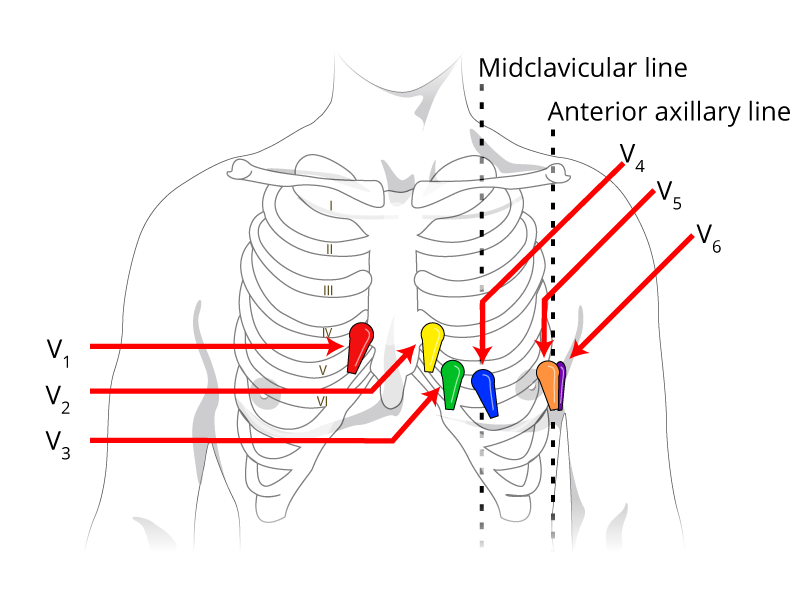
- When you get to the fourth intercostal space (between the fourth and fifth ribs), mark a small cross just to the right of the sternum. This is where V1 will go.
- V2 is placed in line with V1, but on the opposite side of the sternum. Mark a small cross at this point.
- Continue to slide your finger along the fourth intercostal space until you reach the mid-clavicular line, then move your fingers down and into the fifth intercostal space (between the fifth and sixth ribs). Mark a small cross for V4.
- V3 will be attached at the midway point between V2 and V4.
- In the fifth intercostal space, locate the midaxillary line (middle of armpit). This is lead V6.
- Mark a small cross between V4 and V6; this is where V5 will go.
