
Prerequisites
To create or manage a course, you must have Course Administrator or Instance Administrator privileges.
Creating a New Course
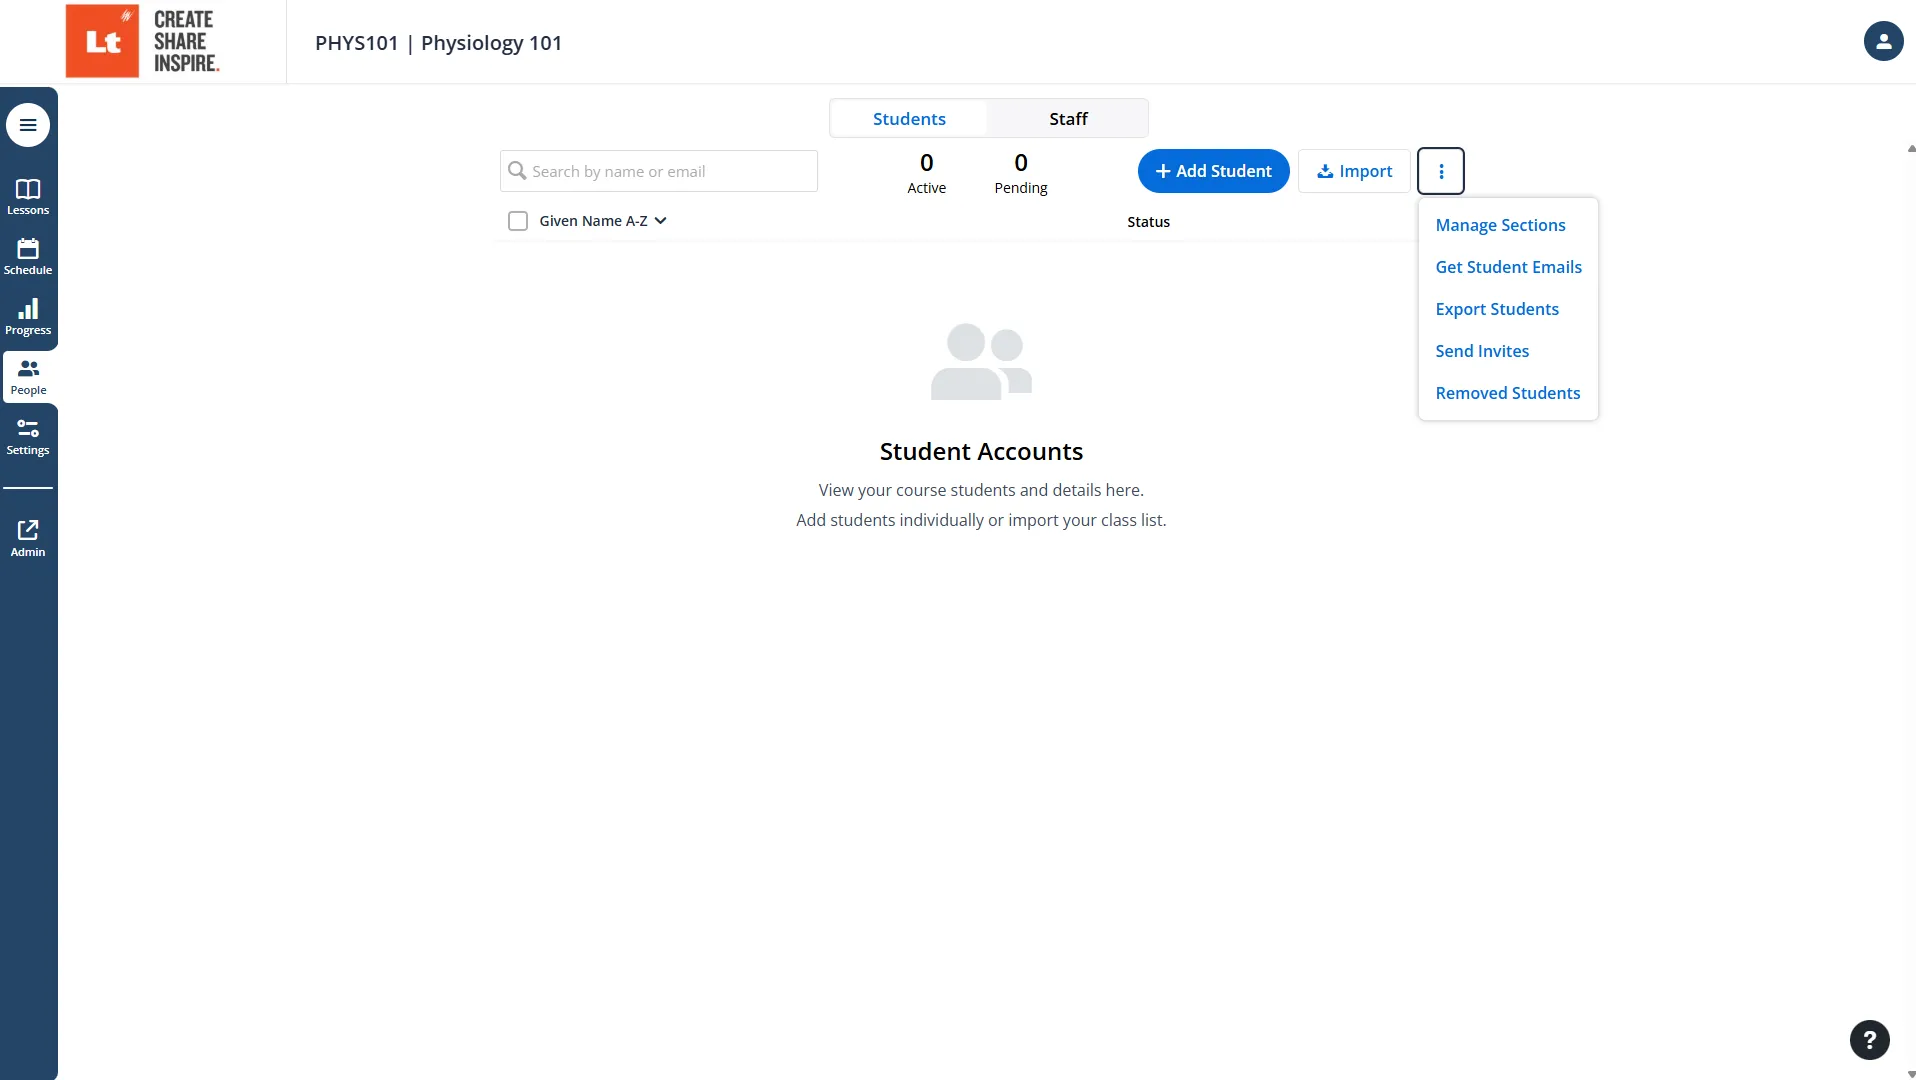
- Click + Create Course.
- Enter the Course Name, which appears at the top of the course card and browser tab.
- Enter the Short Name, which appears in the course list.
- Select how you would like to Group your Course in the Sidebar
- Click Create Course.
Image
Managing Course Settings
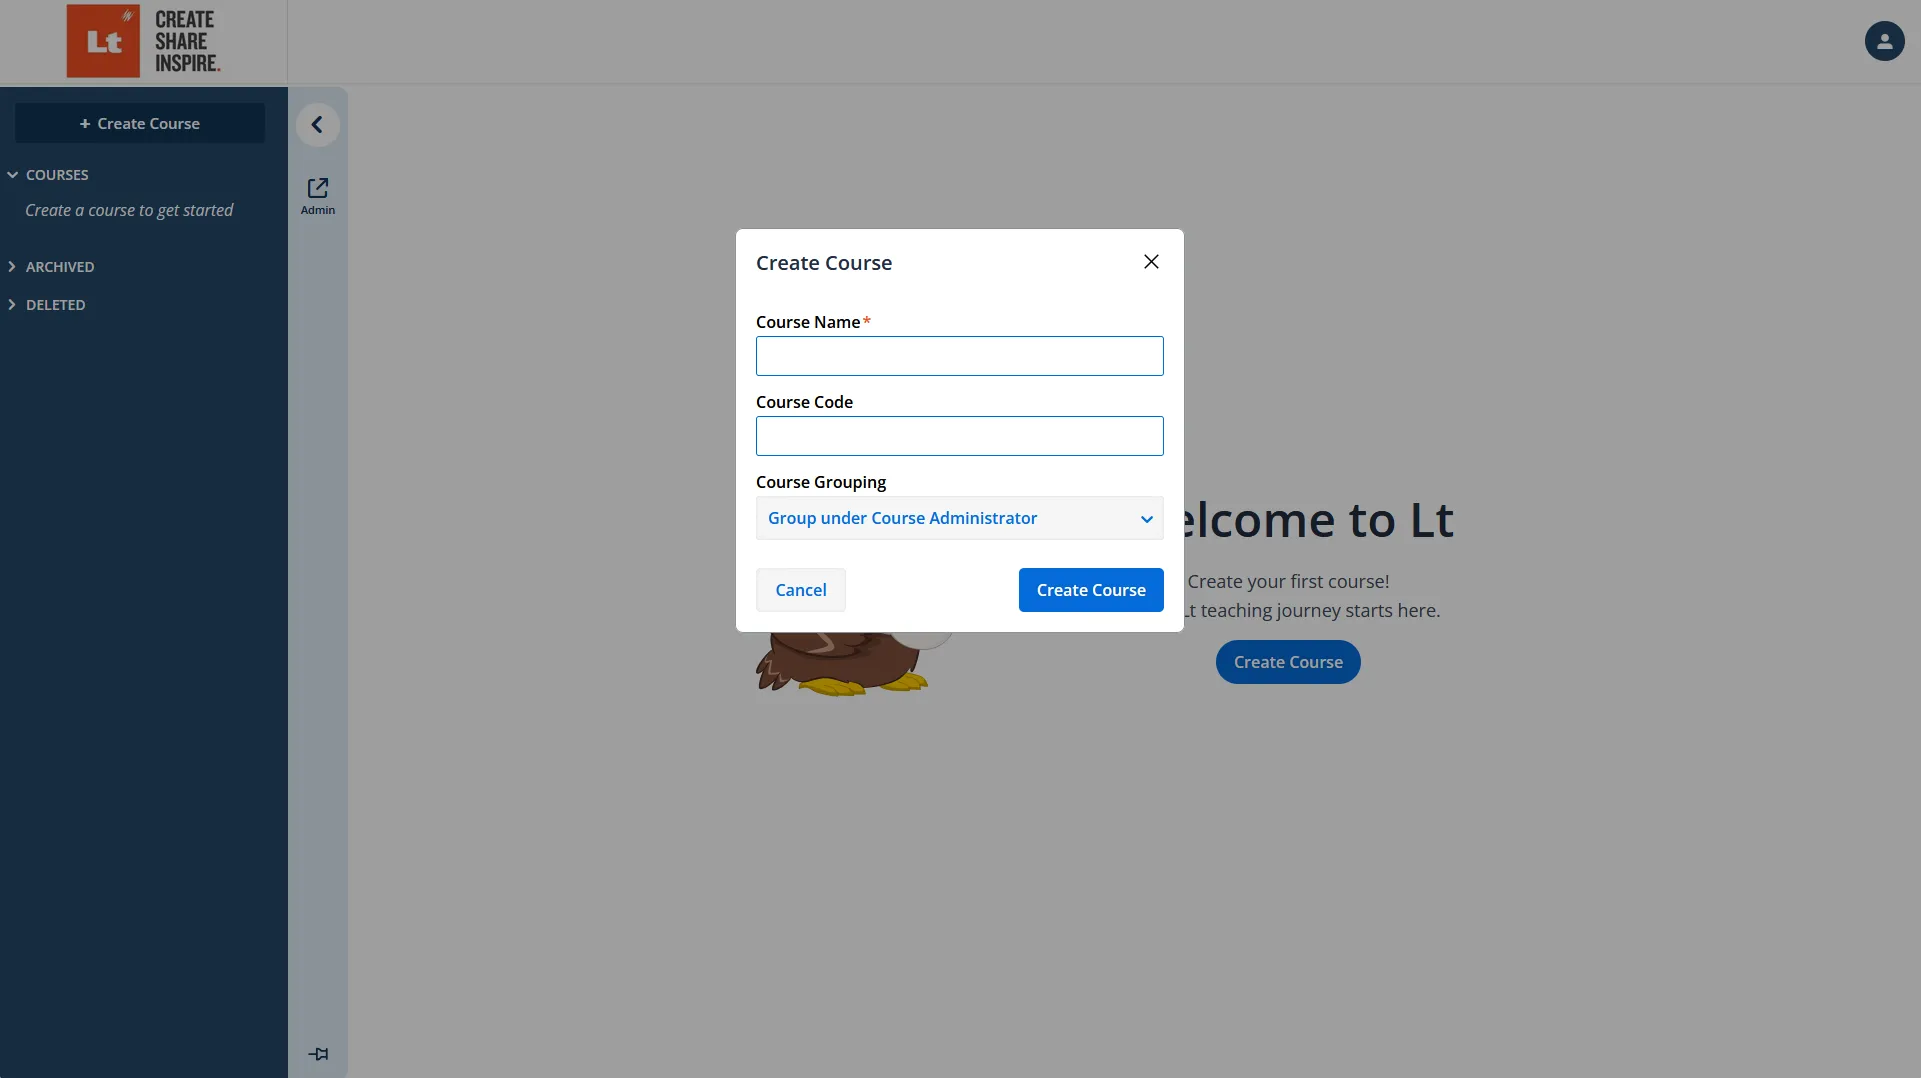
- Click on the settings tab in the sidebar menu.
- In the settings tab, you can:
- Edit the Course Name and Short Name.
- Assign a Course Administrator.
- Set the Course Grouping and Student Contact.
- Additional options include:
- Customizing the course invitation email.
- Managing sections.
- Enabling Lesson Reports and Example Data.
- Enabling Lt Sampling for data acquisition with Lt sensors.
Image
Adding Content to Your Course
Adding ADI Content
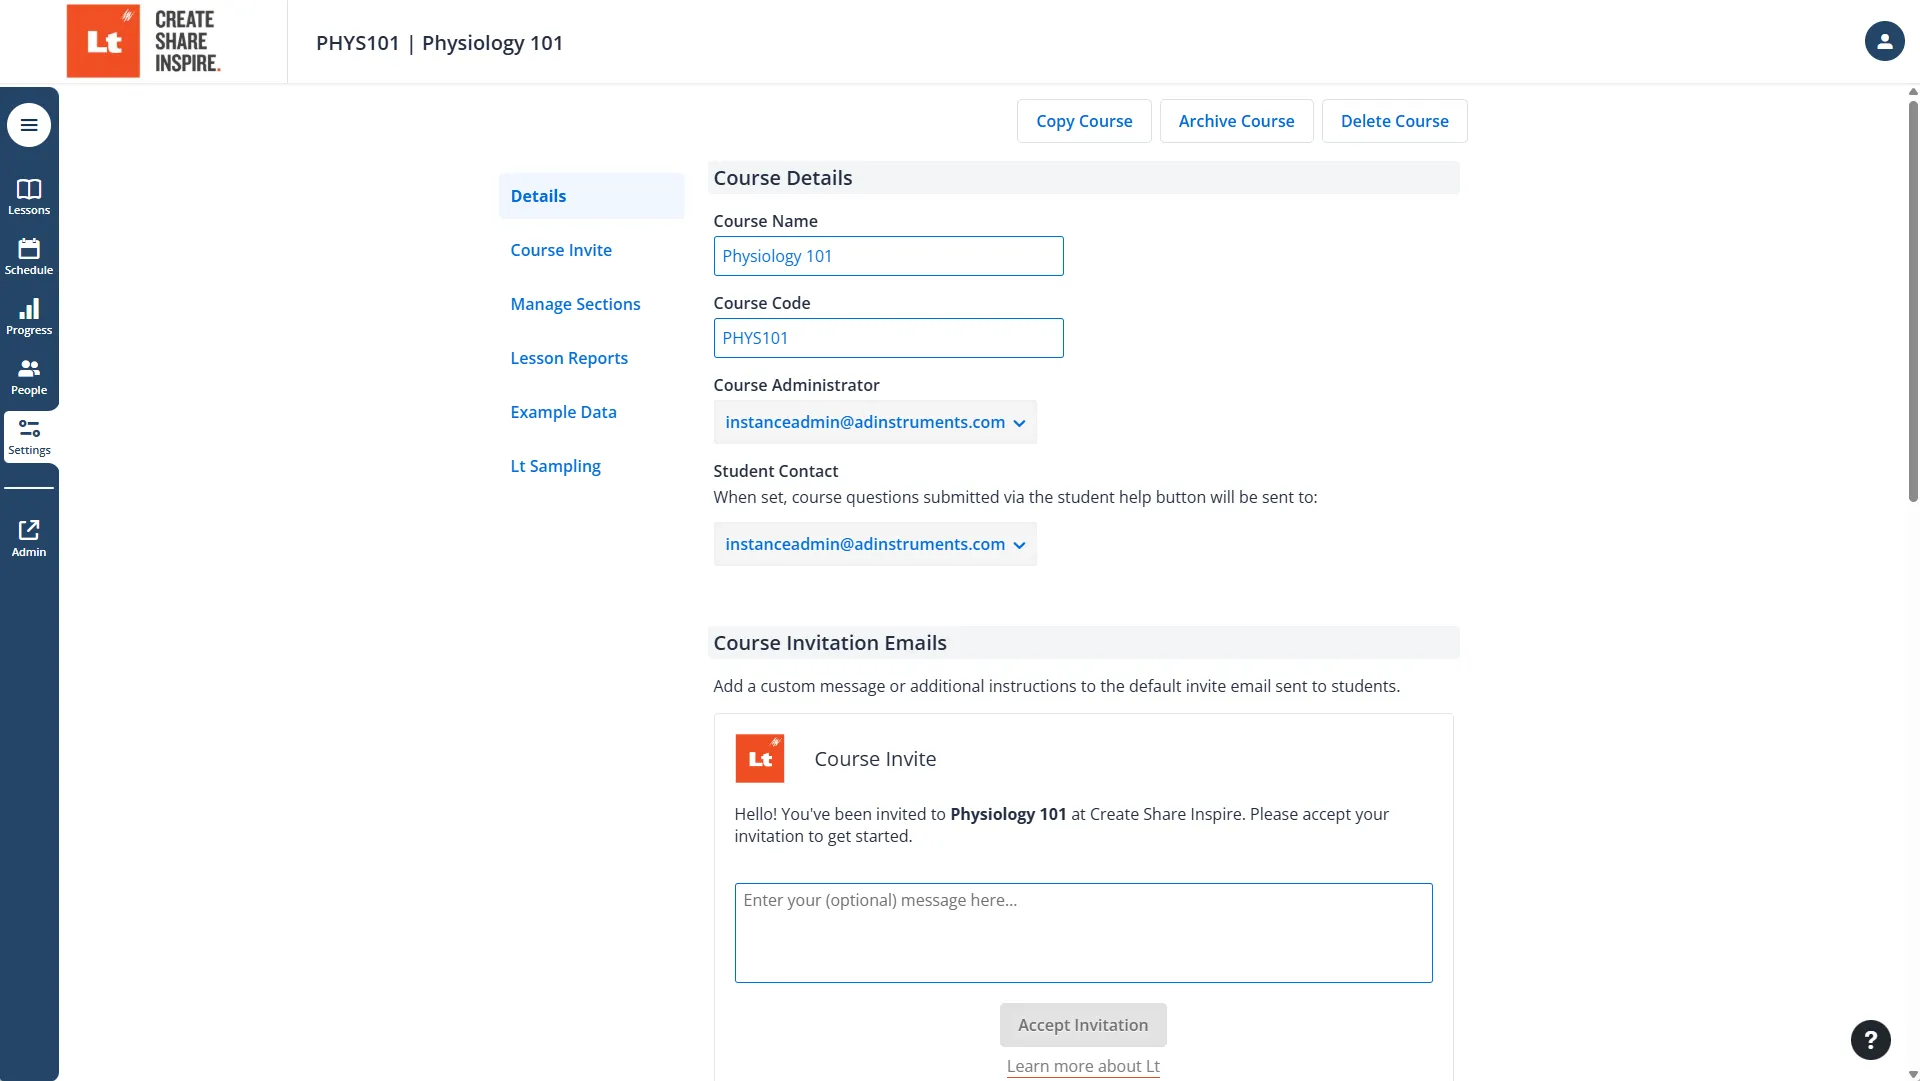
To add pre-built ADI content:
- Click on the Lt Library.
- Select the lessons and modules you want to include in your course.
Image
Creating Custom Lessons
- Click on Create in the Lessons tab.
- Click New Lesson to create a lesson.
Learn more about question types here.
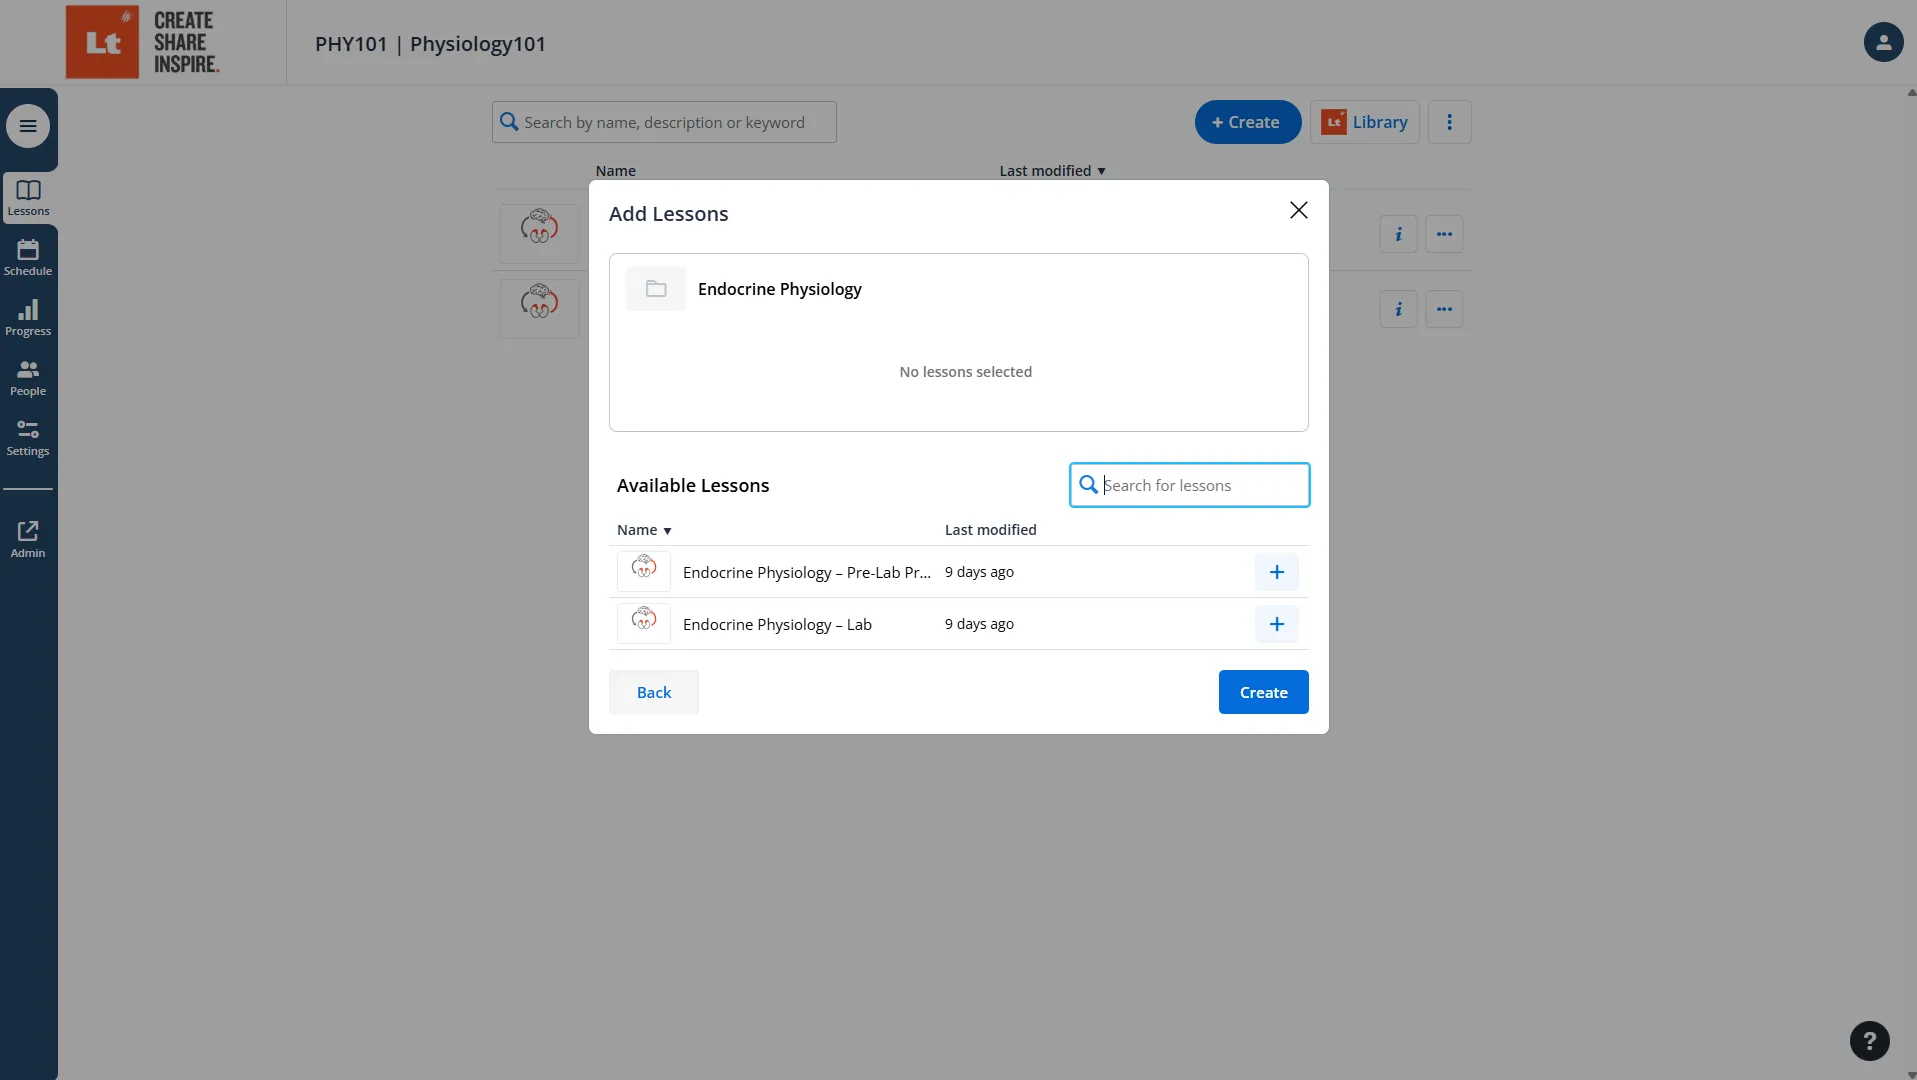
Creating Modules
- Click on Create in the Lessons tab.
- Click New Module and enter the module name.
- Add available lessons to a module:
- Click + Next to the lessons you want to add to the module.
- Set the completion order for the lessons by dragging them in place (any order or sequential).
Image
Adding Staff
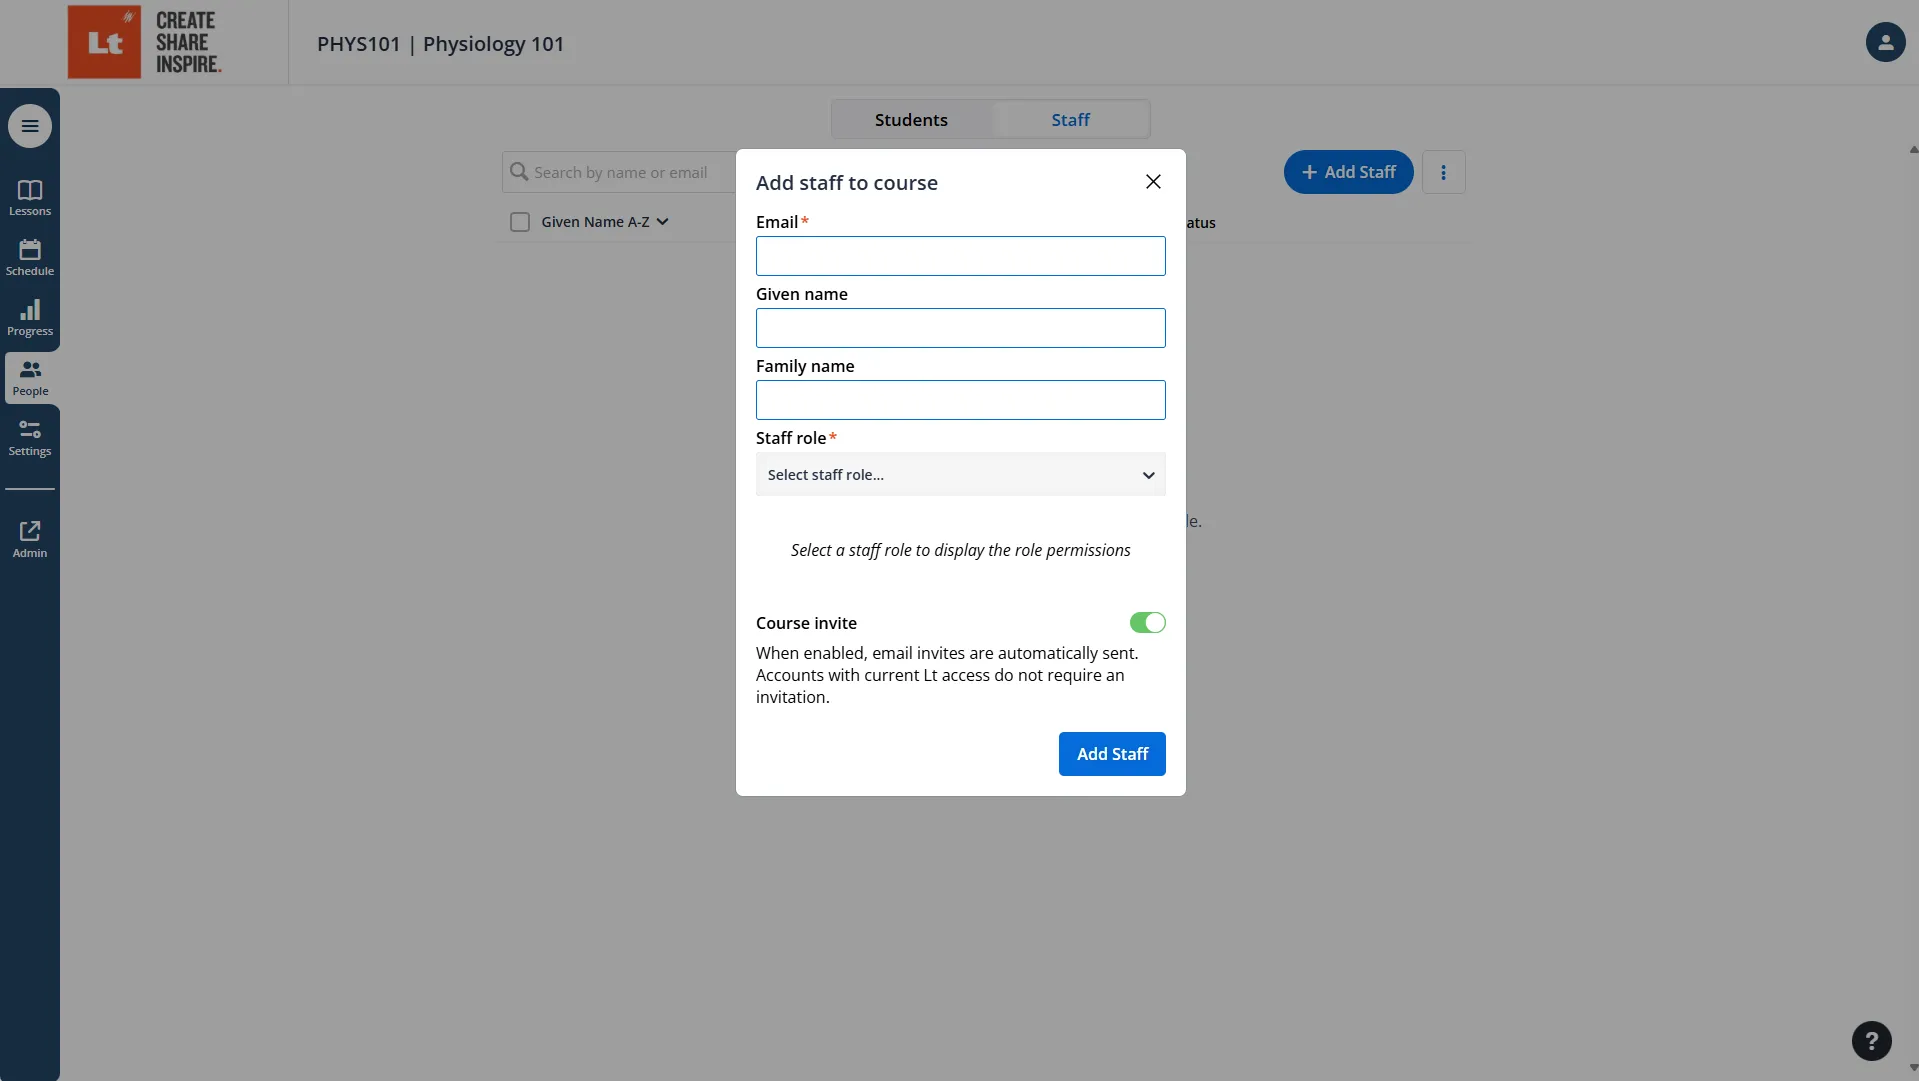
- Click on the People tab, then go to Staff.
- Click + Add Staff.
- Enter the email address, and optionally, the given name and family name.
- Select their role. Learn more about roles here.
Image
Scheduling Lessons and Modules
Once lessons and modules are added:
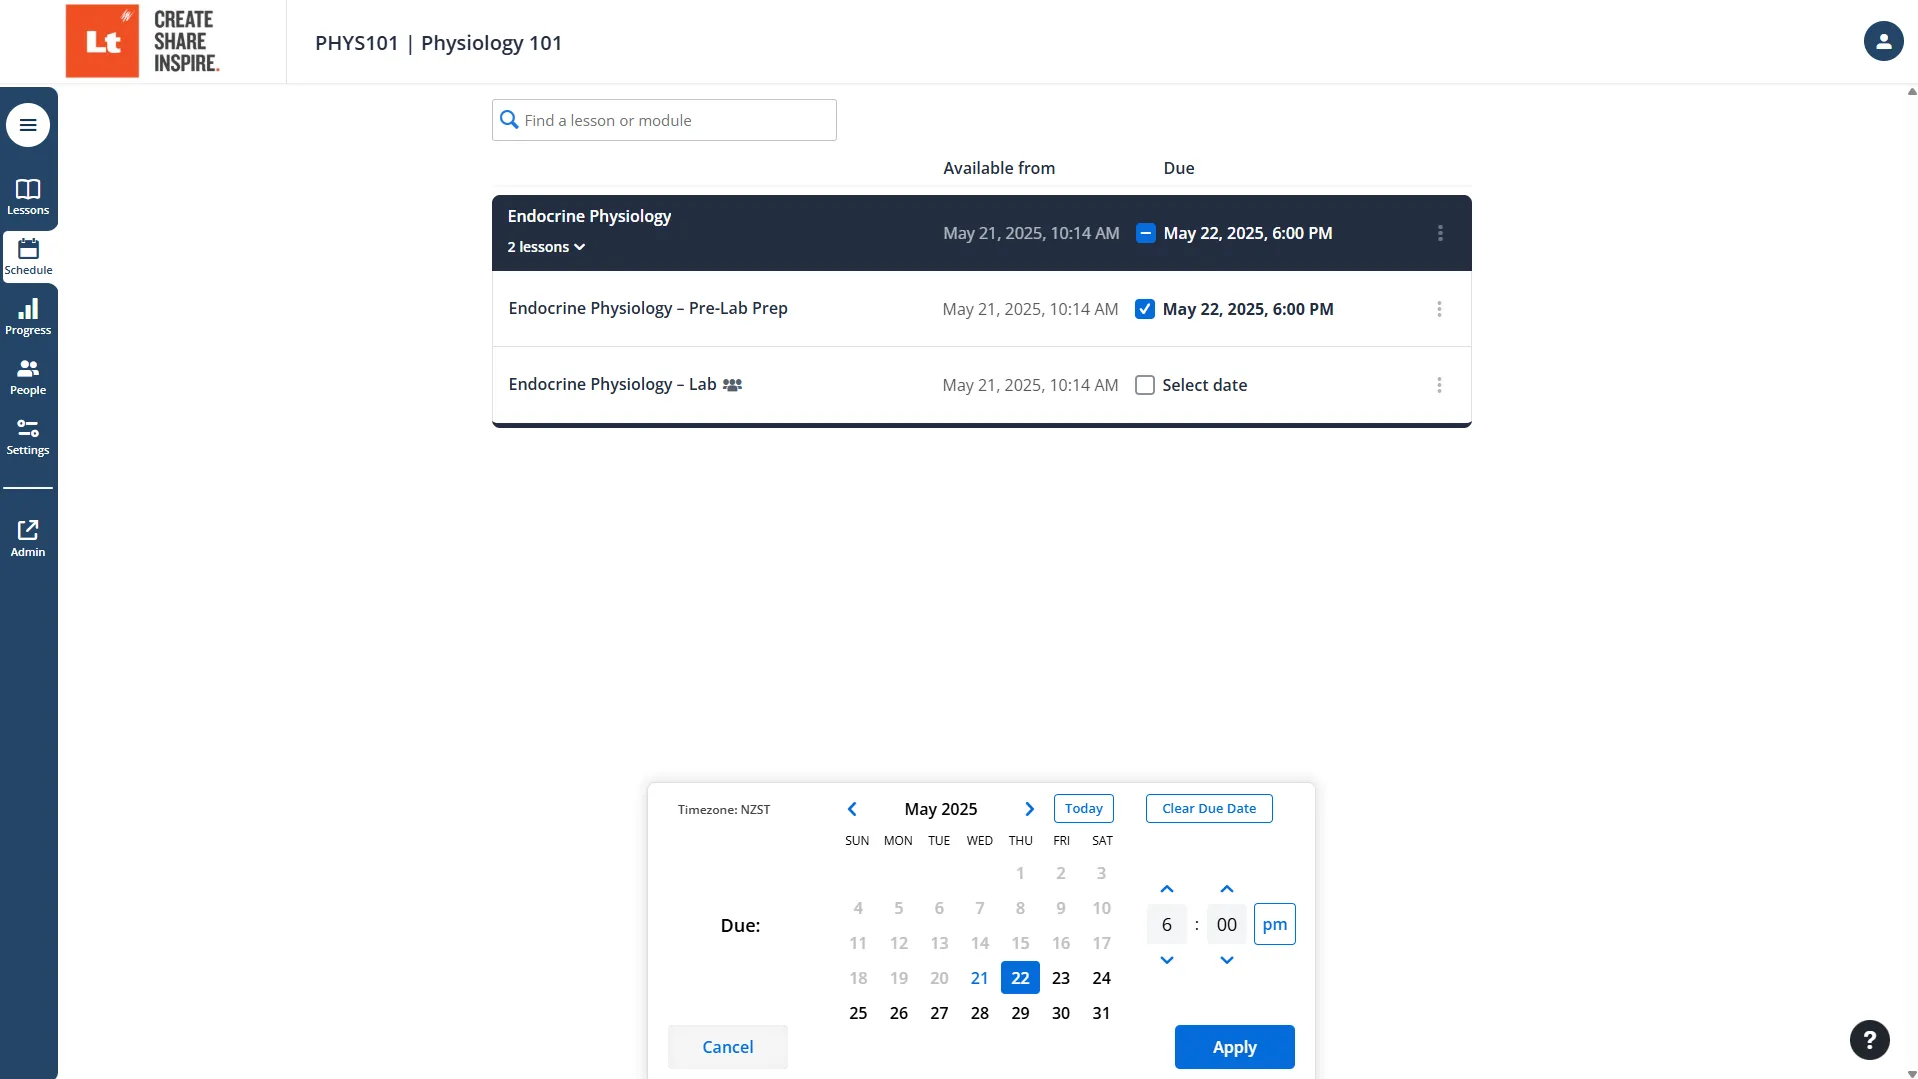
- Go to the Schedule tab.
- Set availability dates for lessons and modules.
- Optionally, set automatic due dates or leave them empty for manual submissions.
Image
Adding Students
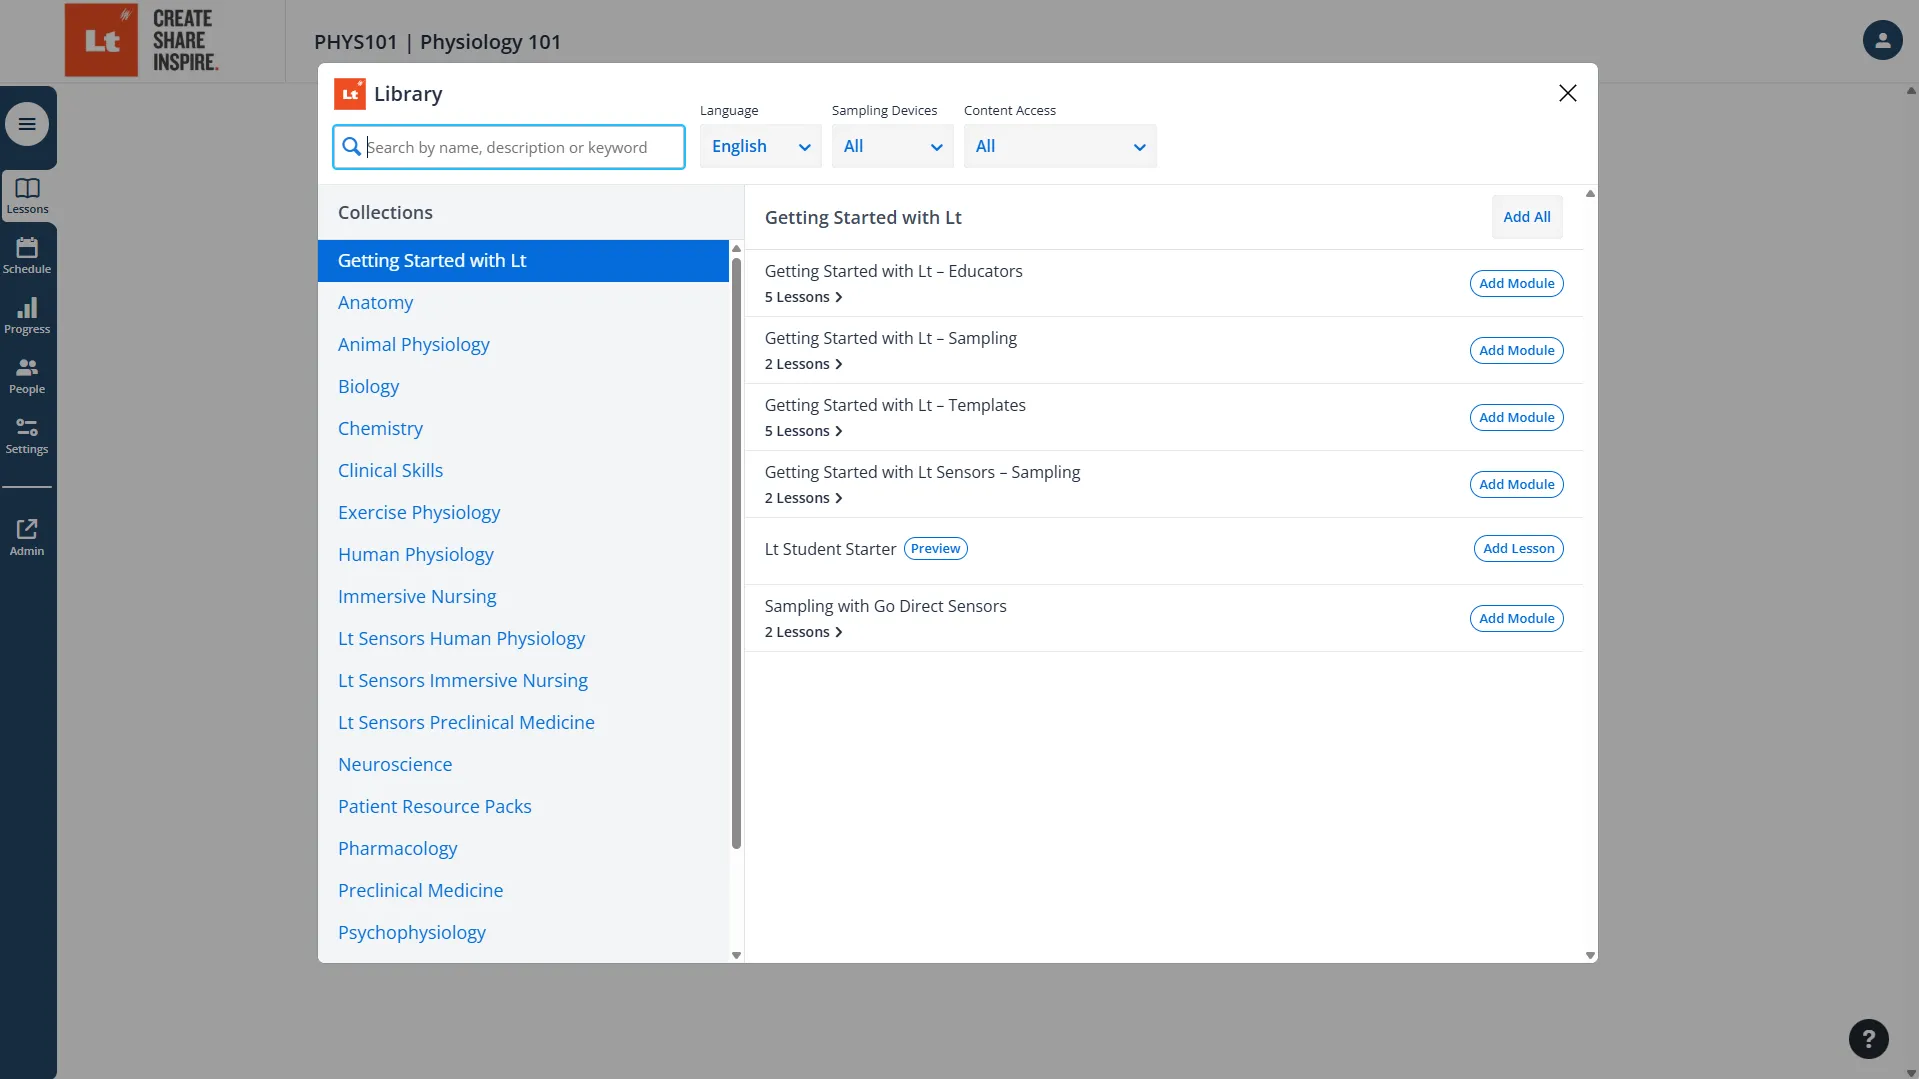
- Click on the People tab.
- Add students individually or import them from a CSV file.
- For LMS integration, refer to our LMS integration guide.
- Send course invitation emails immediately or later using the overflow menu (three vertical dots).
Learn more about adding students here.
Image