To set up Example Data in an Lt Lesson, follow these steps. Note: You must be an Administrator within Lt and have permission to author content.
Step 1: Generate and Save Your Example Data
Use LabChart 8 to generate and save your Example Data. Save the data file to a suitable location for later use.
Step 2: Enable Example Data
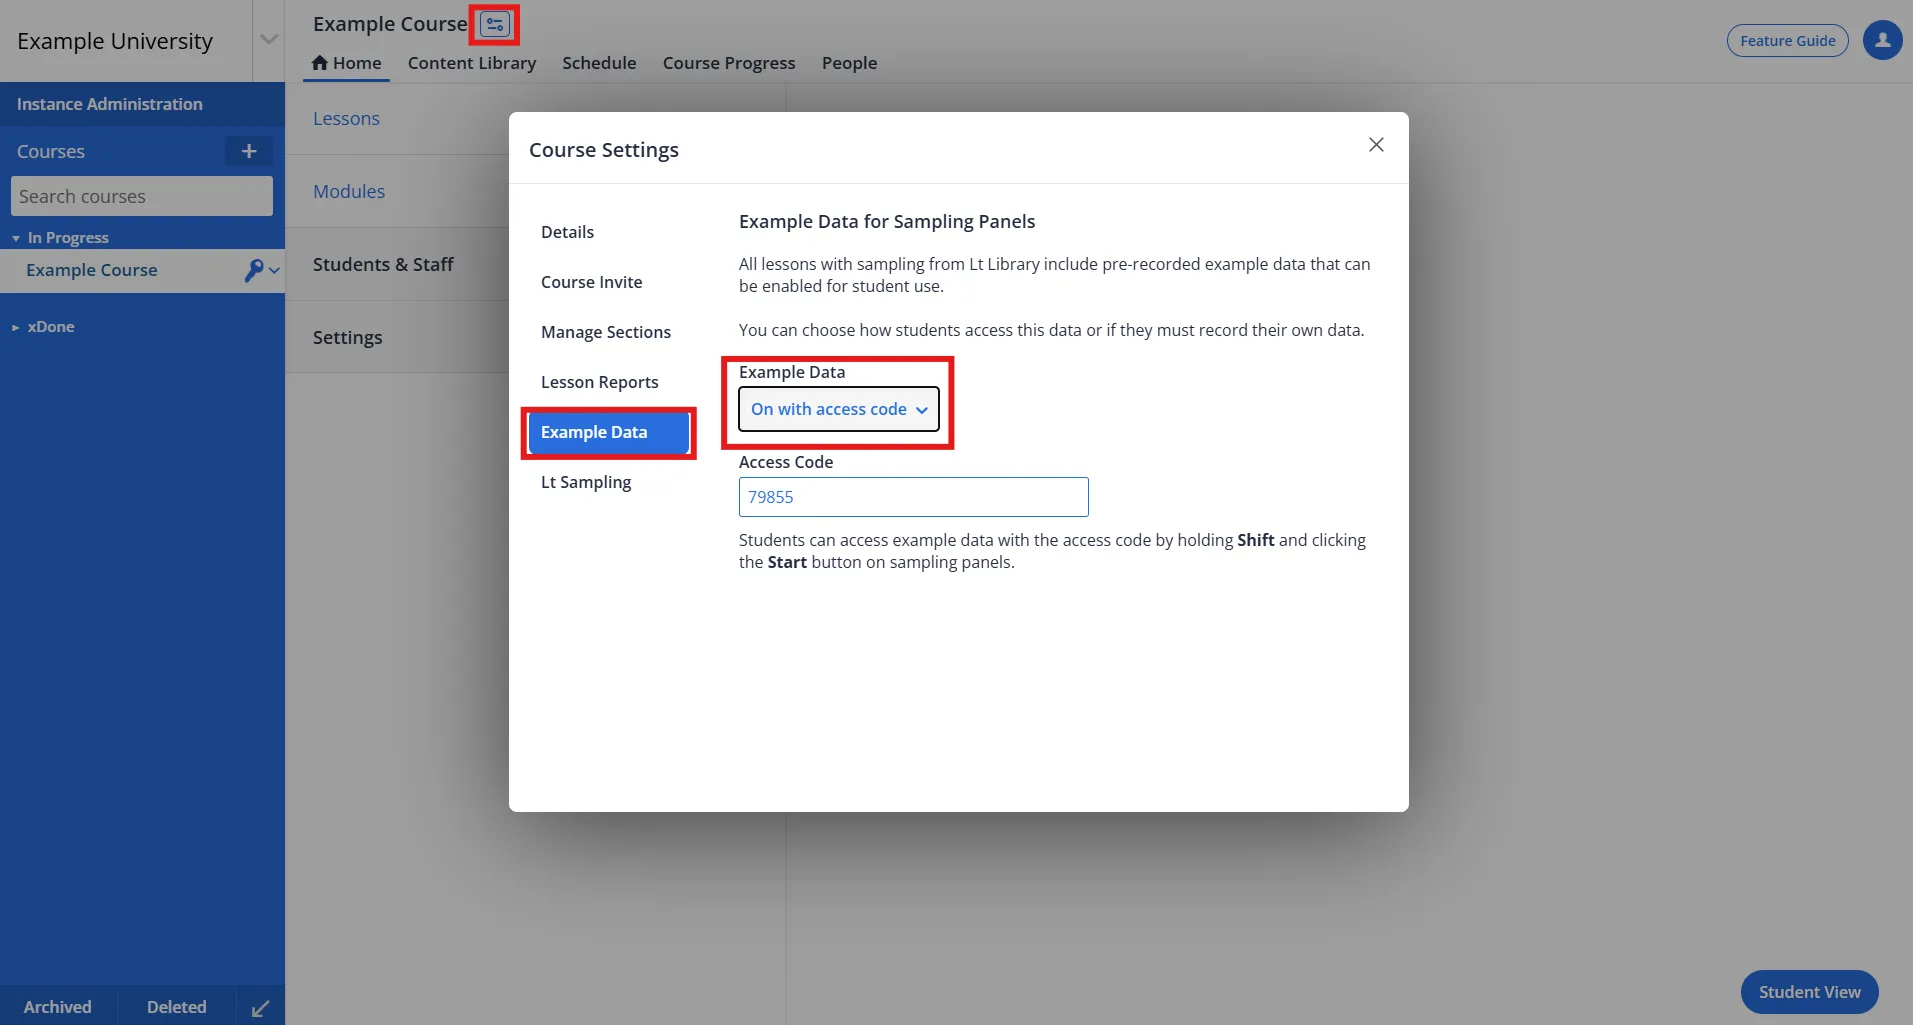
- Navigate to your Course > Settings.
- Scroll to the Example Data Settings section.
- Choose how Example data will be accessed.
- If you select 'On with access code', Create and enter an Access Code. The system generates a numeric code automatically, but you can edit it anytime.
Image
Step 3: Open the Lesson
- Navigate to Lessons > Choose the desired Lesson > Open.
- Click the Data Recording Panel within the lesson.
Step 4: Configure Assessment
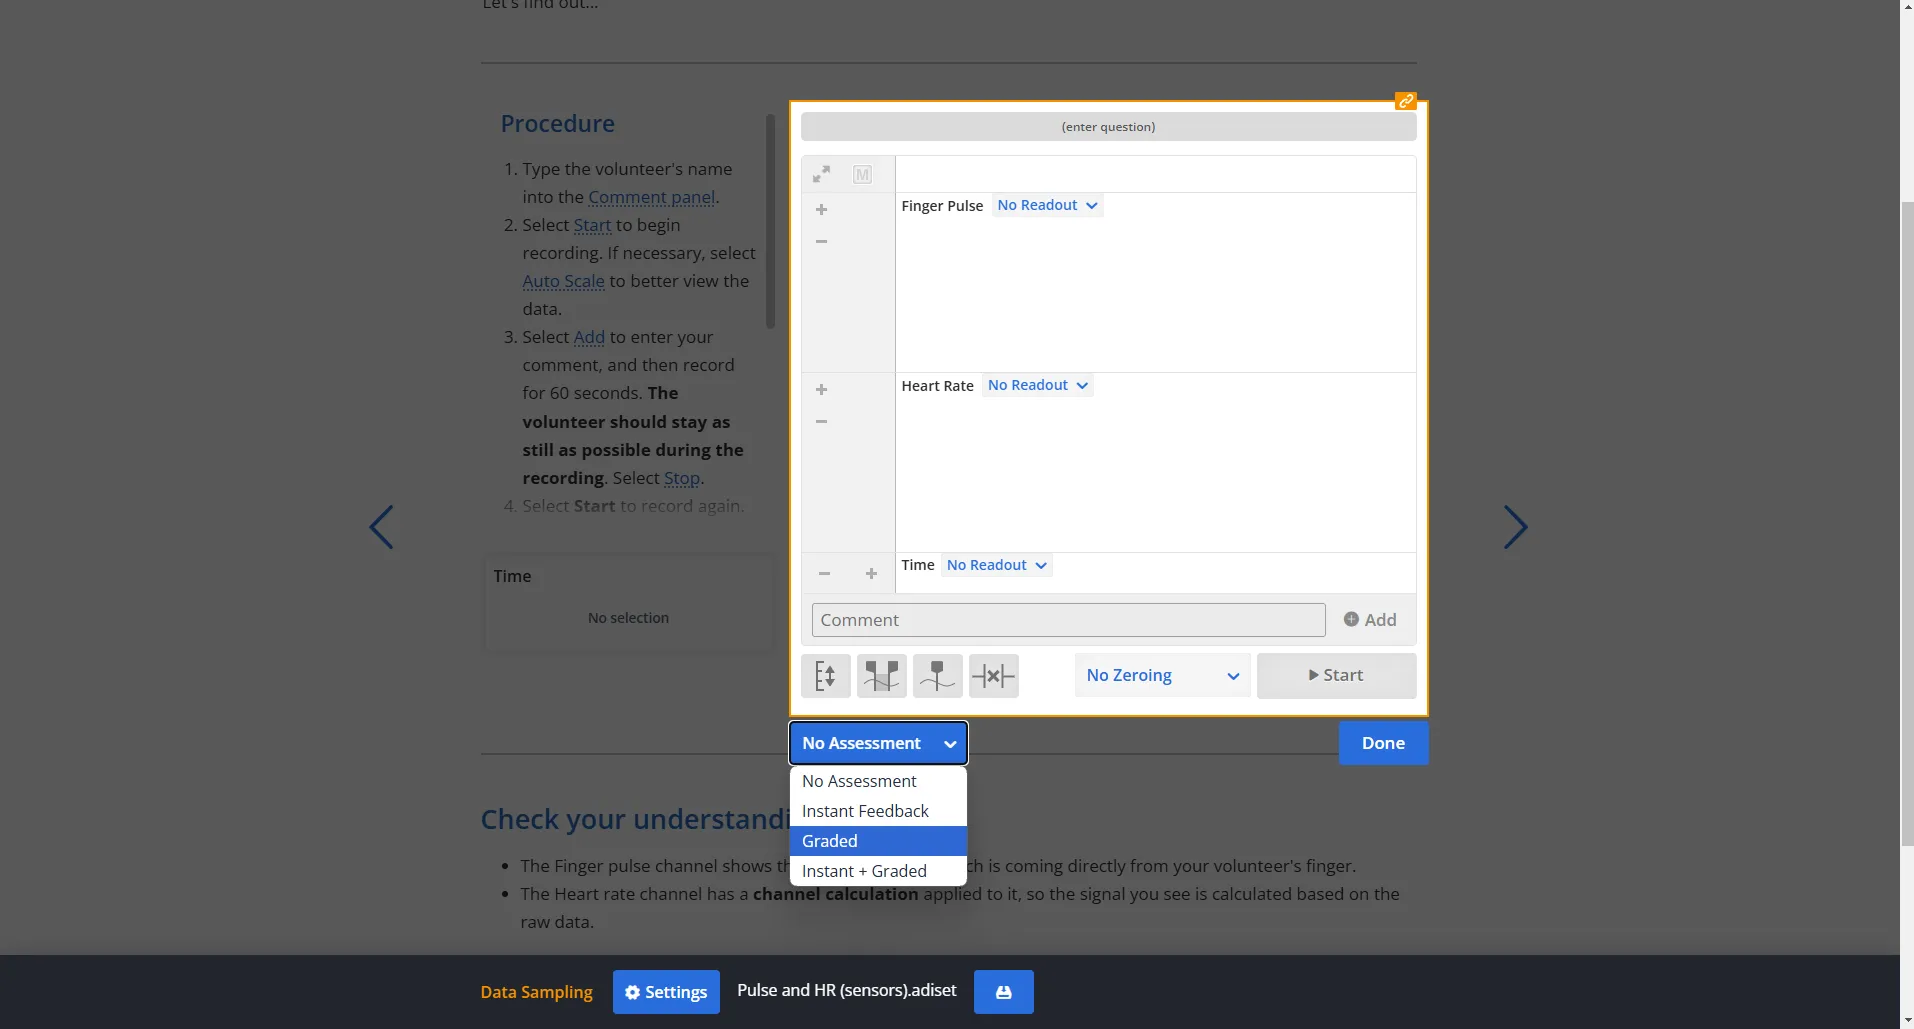
Click Edit on the Data Recording Panel and set the assessment type:
- From the Assessment Menu, select Graded or Instant + Graded. (These settings are required to configure Example Data).
Image
Step 5: Add Example Data
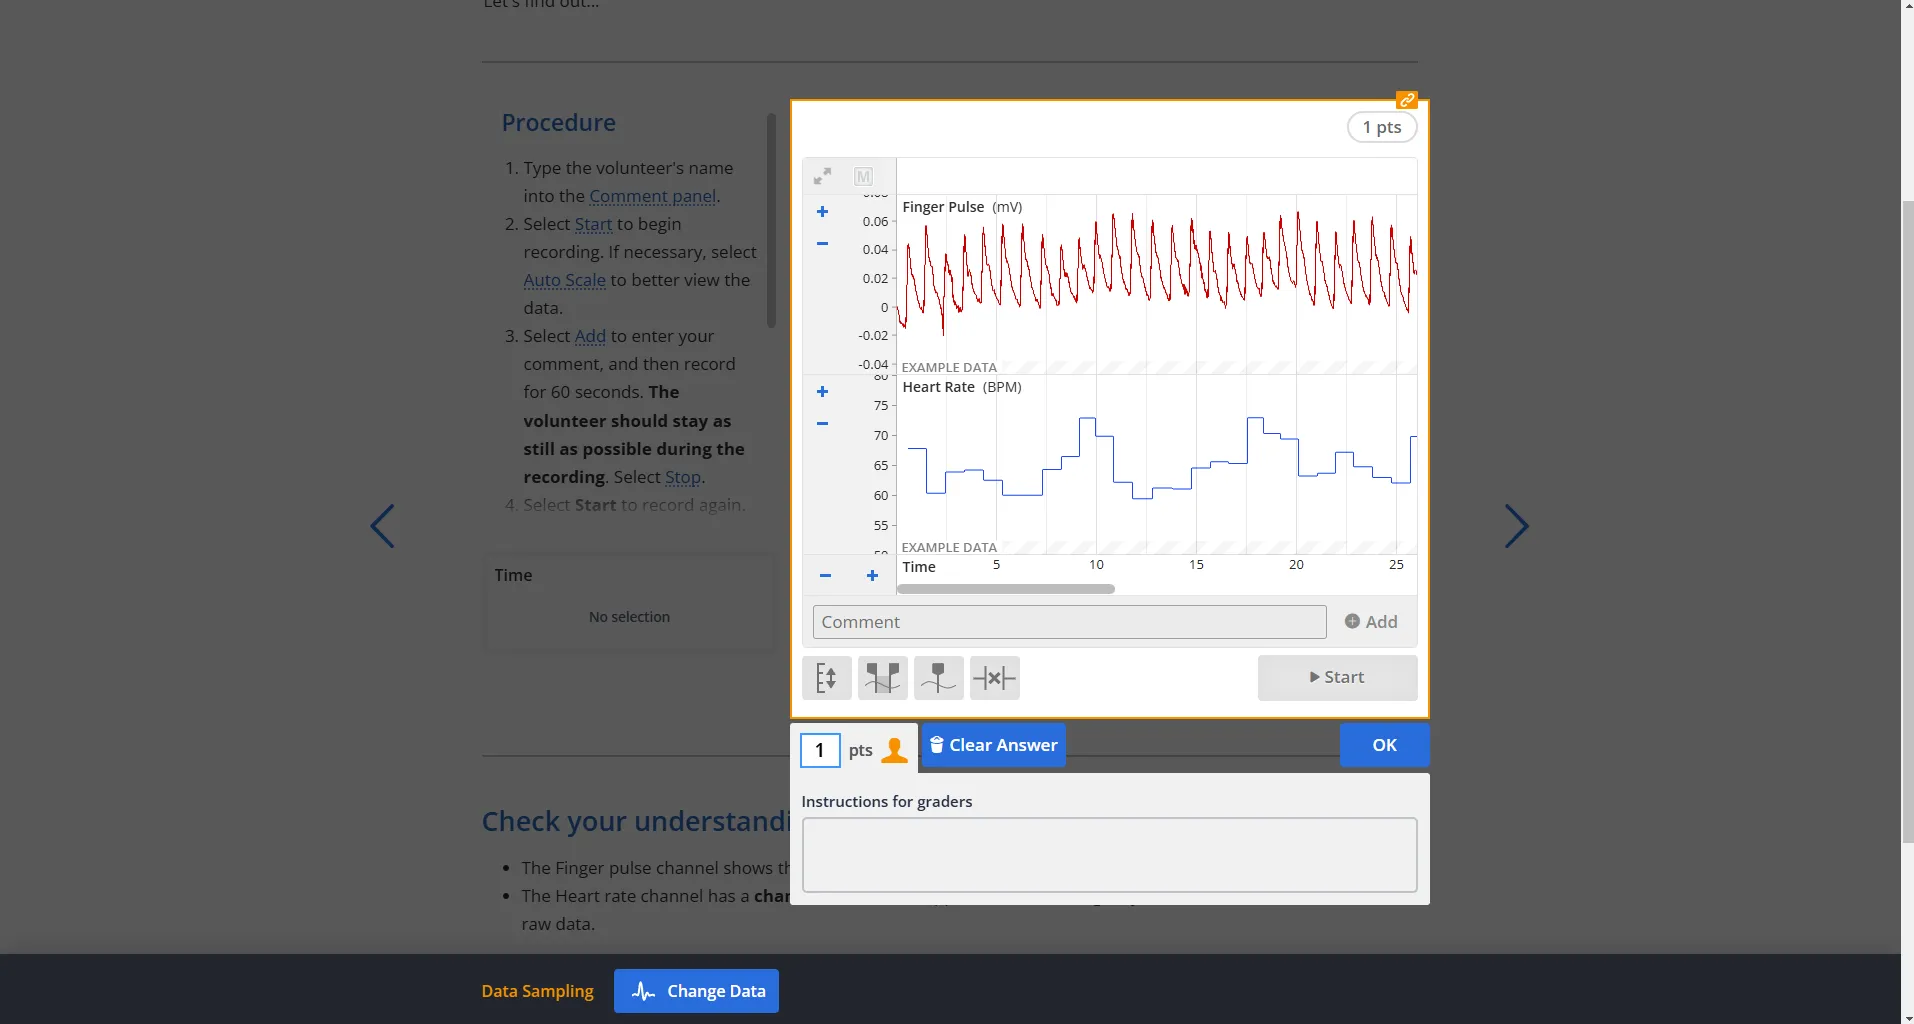
- Click Set Answer and choose Add Data from the toolbar at the bottom of the screen.
- Navigate to the LabChart 8 File generated in Step 1 and click Open.
- The file will be added to the panel as Example Data.
Image
Accessing Example Data
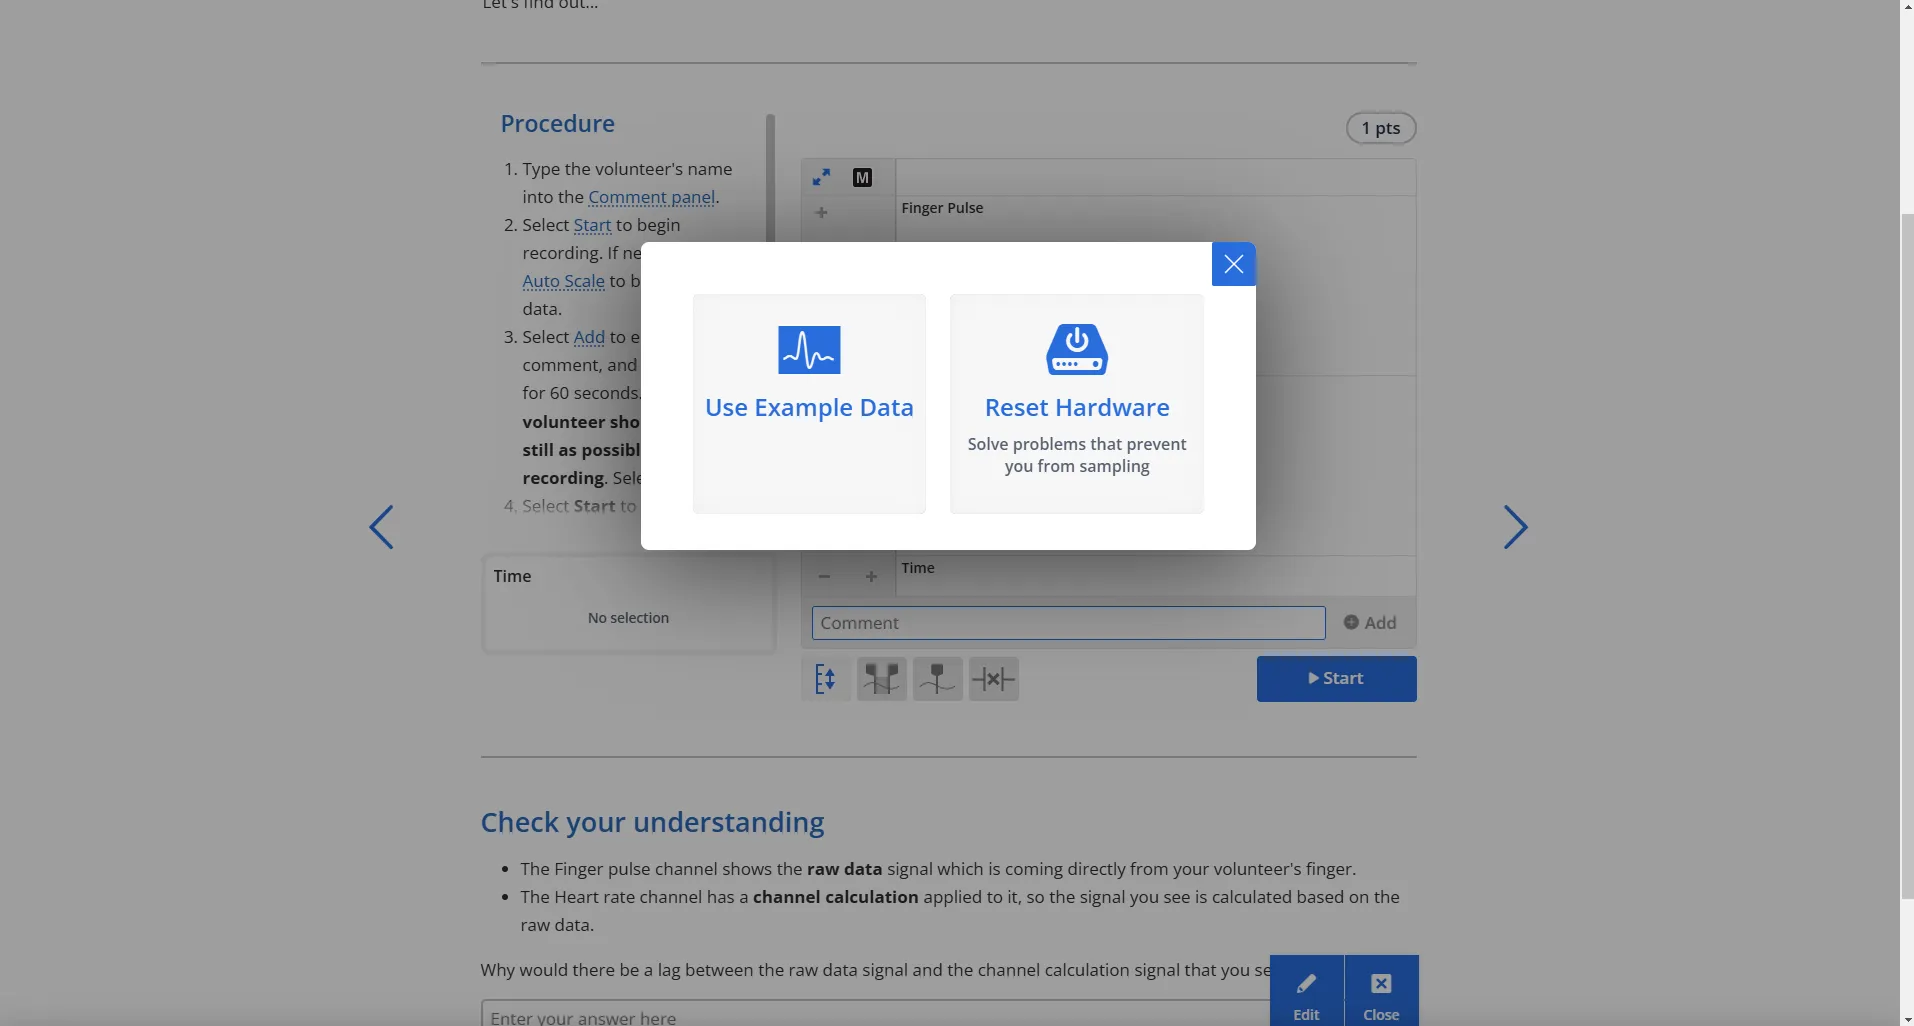
Students can access Example Data by:
- Shift+Left-Clicking the Start button in the Data Sampling Panel.
- Entering the defined Access Code provided by the instructor.
Image
Important Notes
- Make sure to communicate the access code to your students in advance.
- Once students finish viewing Example Data, they can switch back to their own data by Shift+Left-Clicking Start and selecting Use Student's Data.