Navigate to the People Tab to perform the following actions:
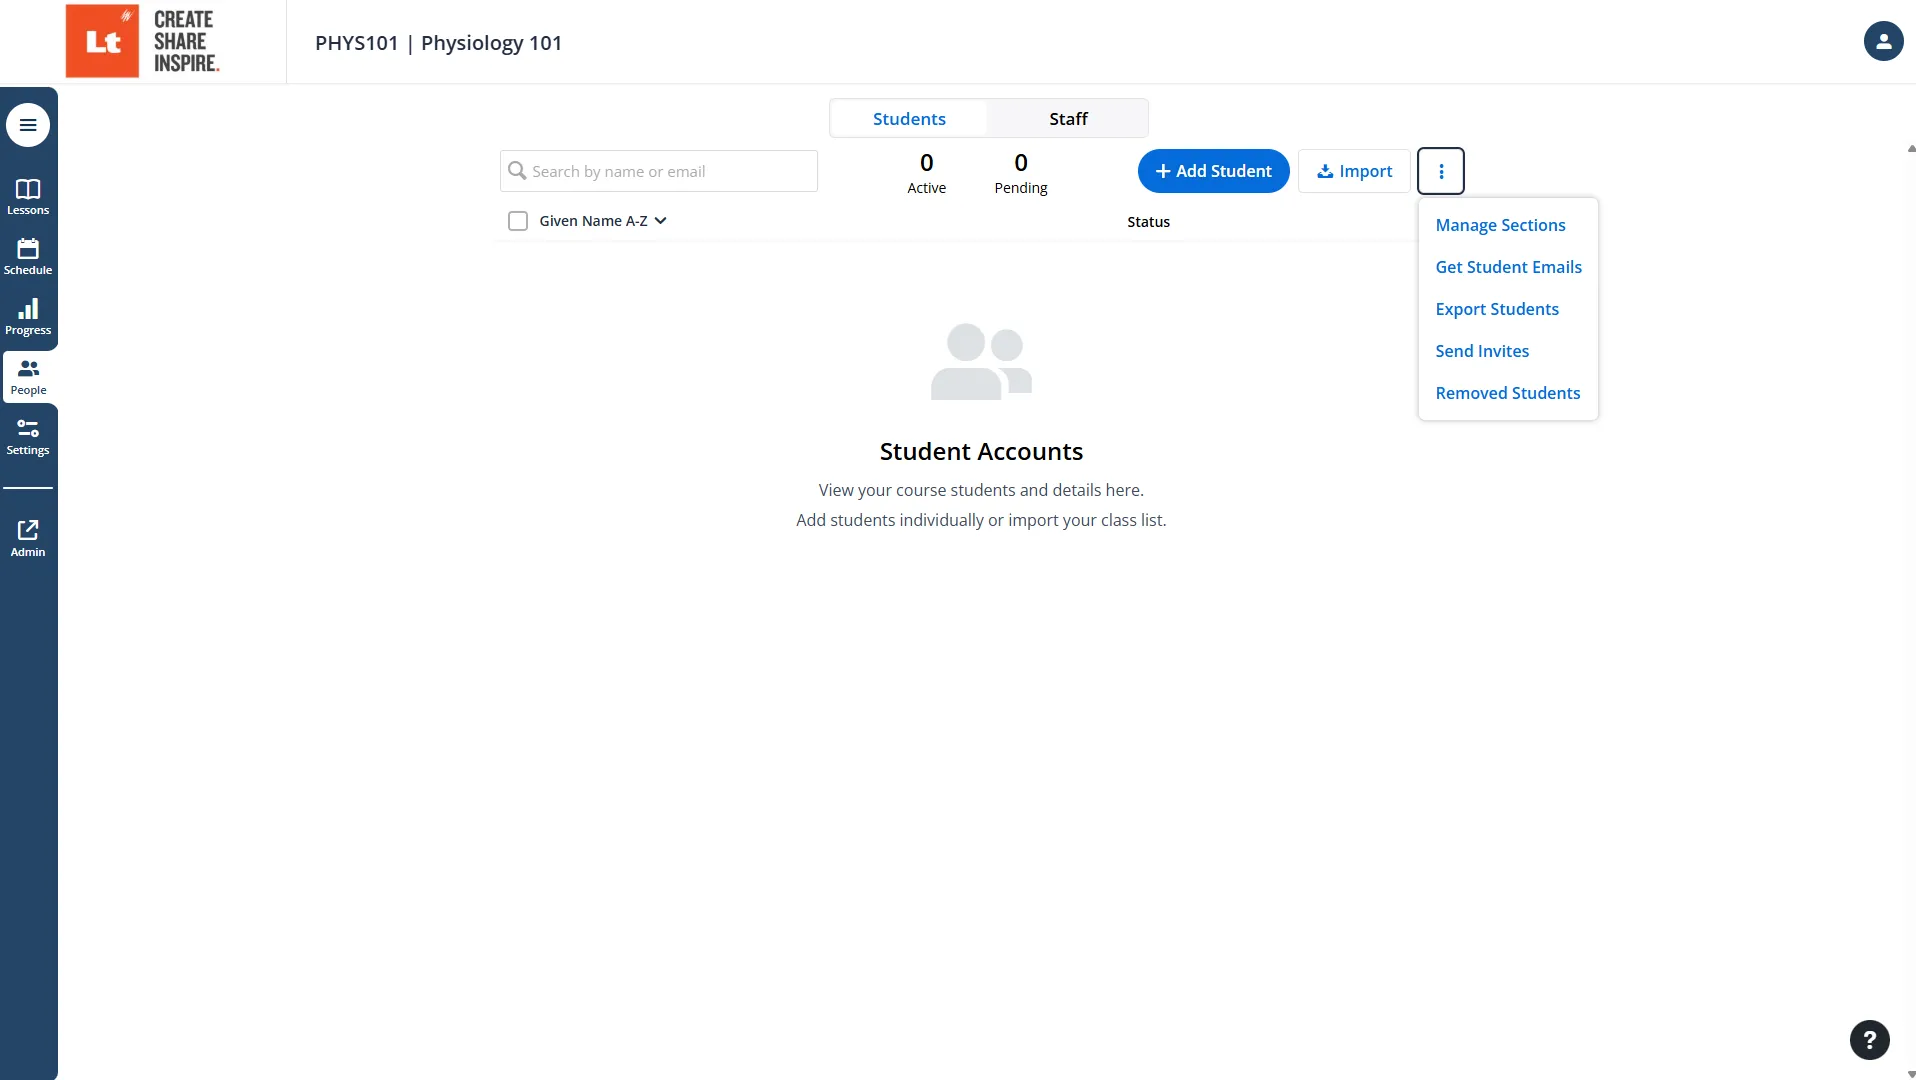
- Import or add students.
- Remove students from the course
- Manage sections.
- Search or filter students by name.
- Restore students via the "Removed Students" option.
- Export student lists and emails.
Adding Students to an Lt Course
Adding a Student
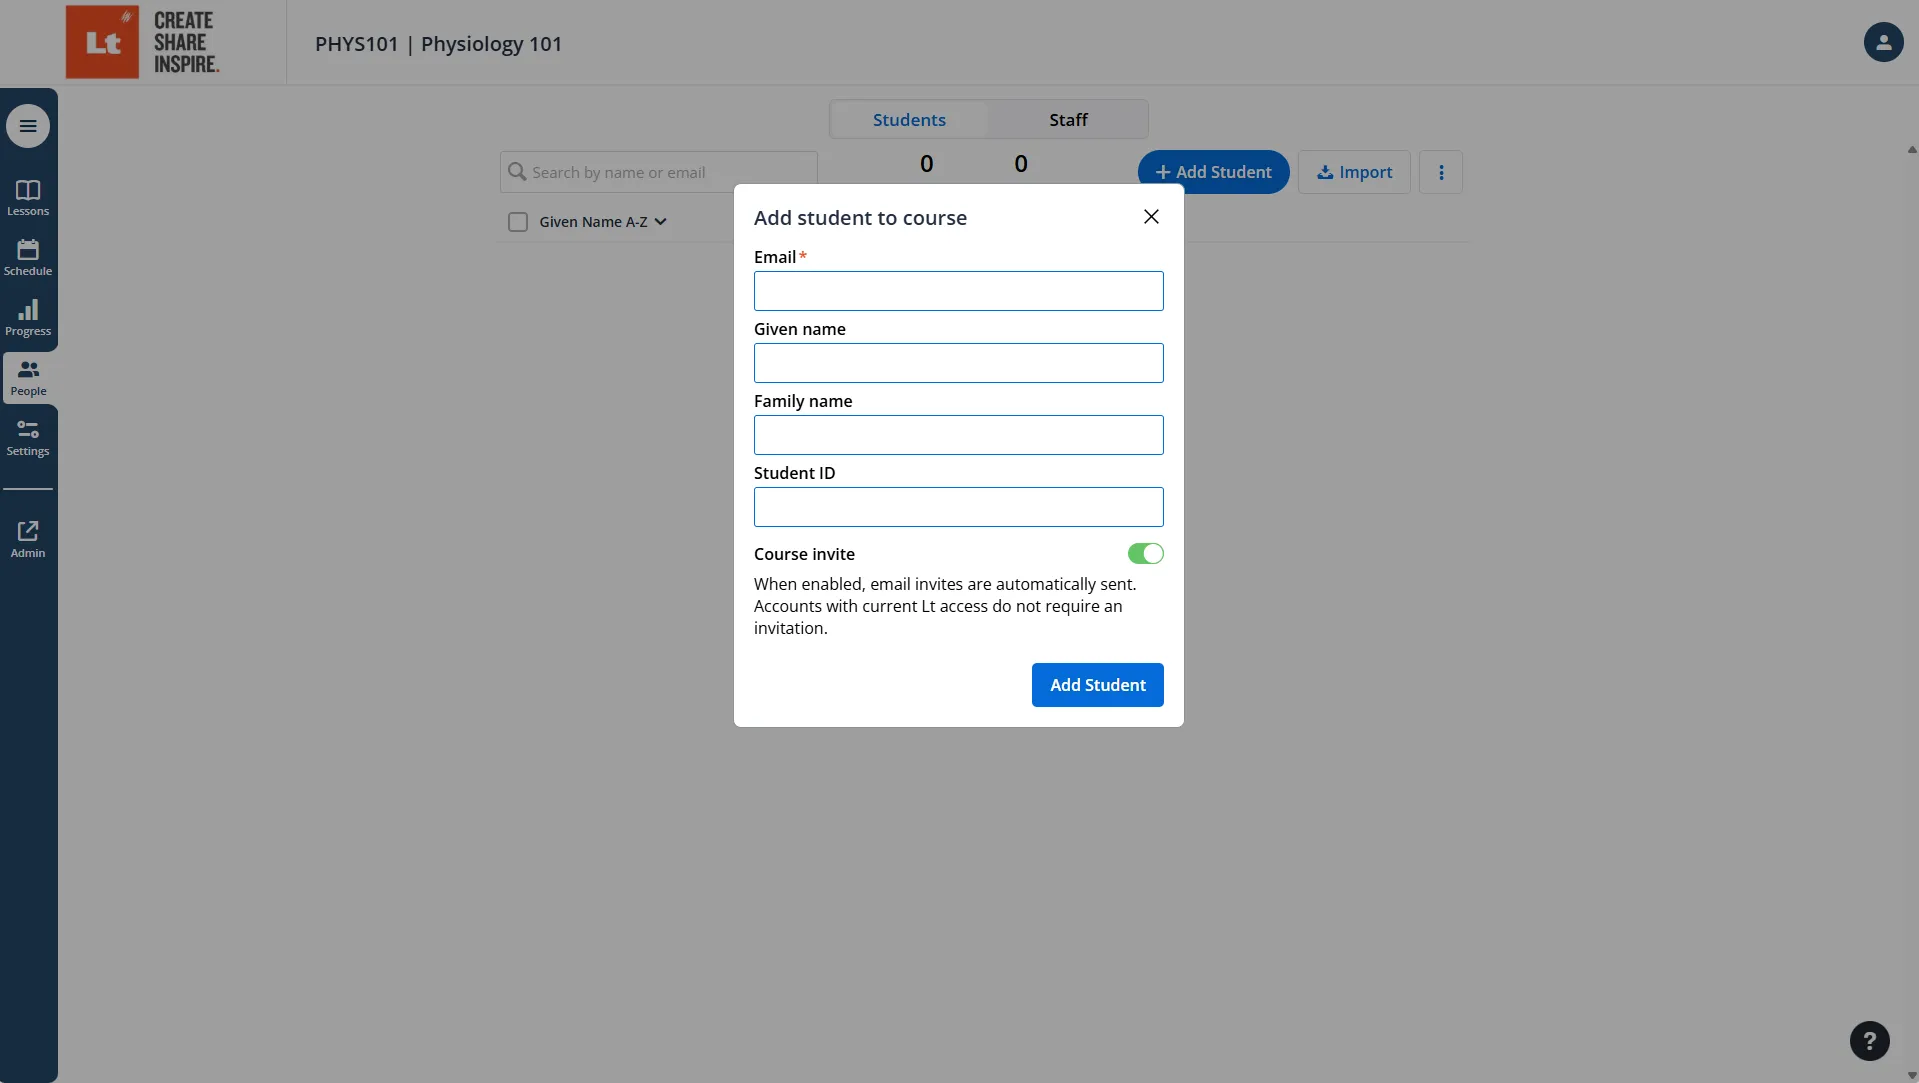
To add a student to your Lt course, follow these steps:
- Click the "Add Student" Button:
- Navigate to the People tab in your course, then click the Add Student button.
- Enter the Student's Details:
- Fill in the required details, such as the student’s name and email address.
- Send Course Invitation (Optional):
- Use the "Send Course Invite" toggle to automatically send an invitation email to the student after creation.
- If you prefer to send the invitation later, leave the toggle off. You can send the invite manually at any time using the overflow menu (three vertical dots).
Tips: Verify the student’s email address is accurate to prevent invitation delivery issues.
- For efficiency, consider using the bulk import feature with a CSV file if you are adding multiple students.
Removing a Student
To remove student(s) from your Lt course, you have two options:
- Remove a Single Student:
- Use the overflow menu (three vertical dots) next to the student’s name and select Remove from Course.
- Remove Multiple Students:
- Select the checkboxes next to the students you wish to remove.
- Click the Remove button at the top of the list.
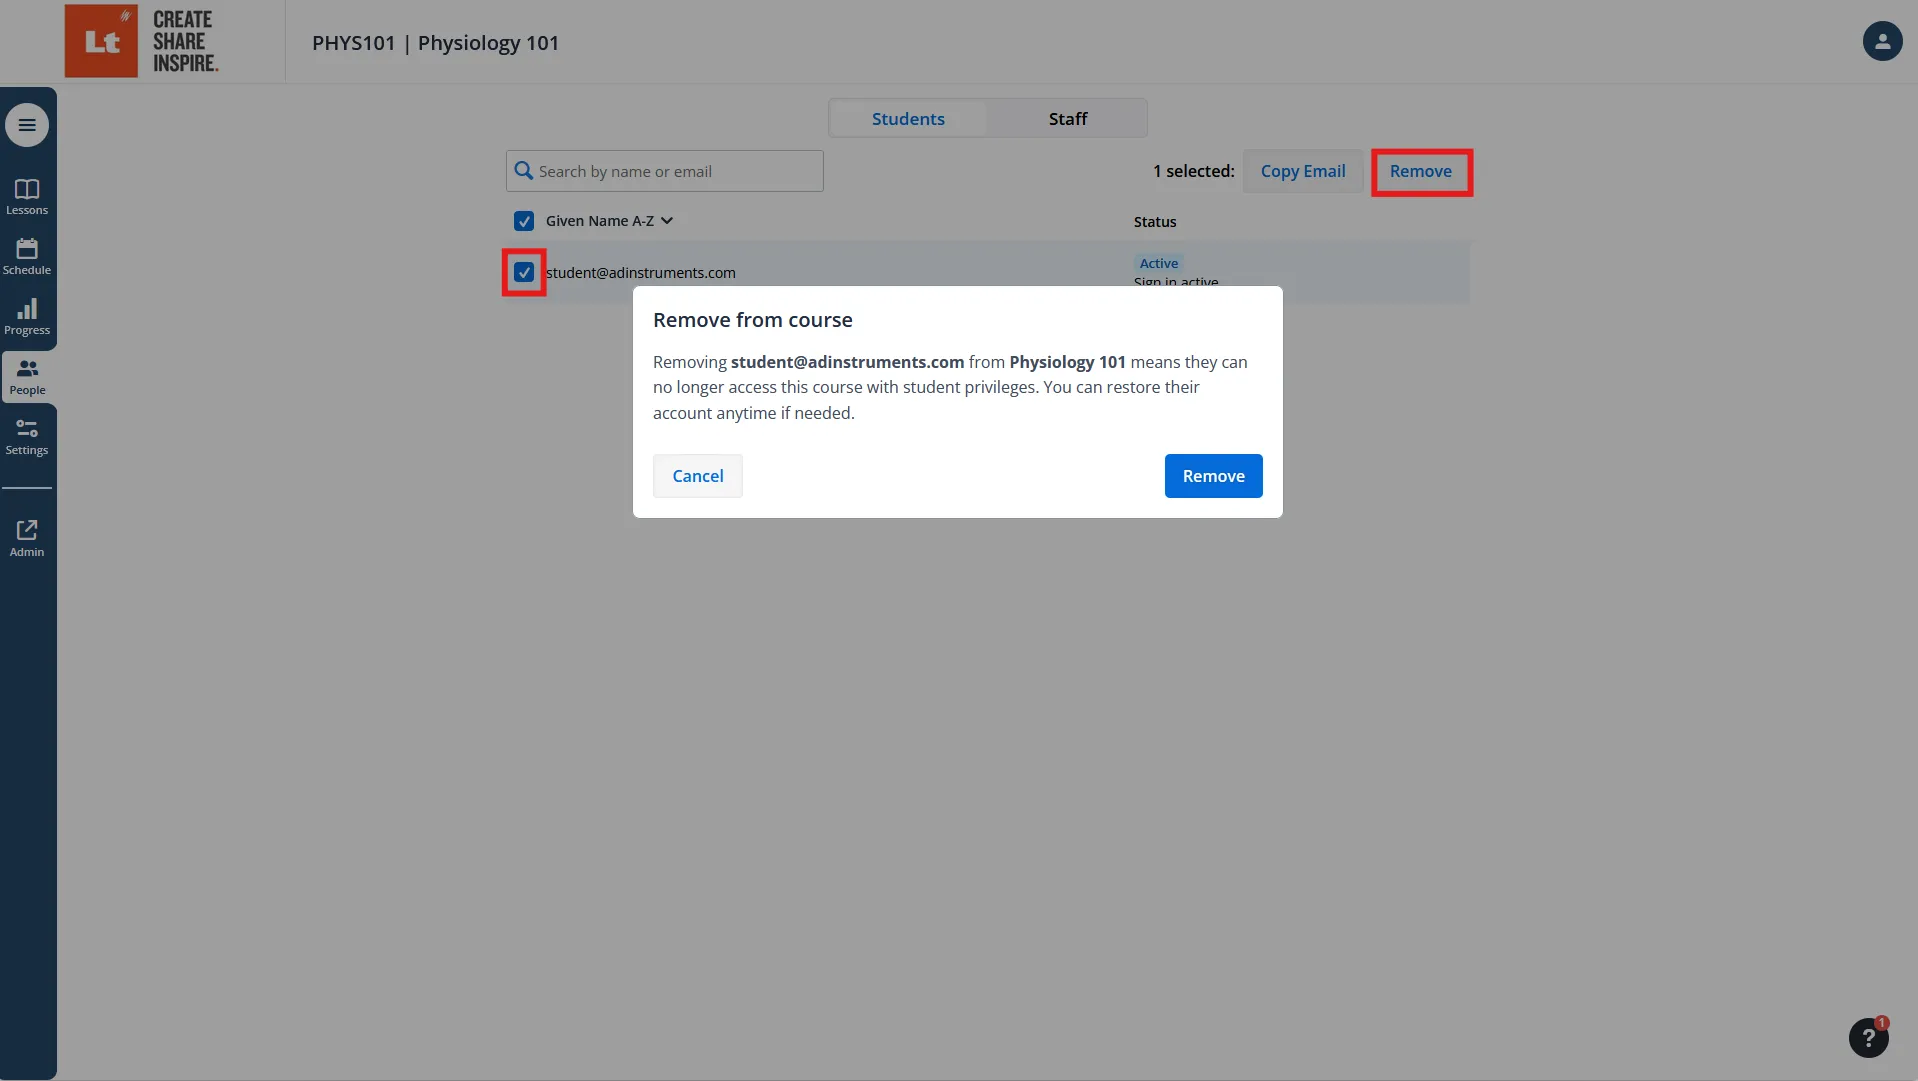
Note: Removing a student will unenroll them from your course, but it does not delete their account from the Lt instance. To fully delete a student account, refer to the instance administration guide.
Importing Students Using a CSV File
To import students, prepare a CSV file with the following headers:
- 📄 Email (Required): Every student must have a valid email address (e.g., user@gmail.com).
- 🆔 Student ID (Optional): Helps with data reconciliation.
- 👥 Given Name (Optional): Used for identification and greetings.
- 👥 Family Name (Optional): Used for identification and greetings.
- 📚 Section (Optional): Allows filtering in the grading interface.
Download a Sample CSV Template
| Student ID | Given Name | Family Name | Section | |
|---|---|---|---|---|
| student1@example.com | 123456 | John | Doe | Section A |
| student2@example.com | 654321 | Jane | Smith | Section B |
Importing Students Using LMS
Before using LMS, ask your IT team to integrate Lt with your LMS via the LTI standard. Learn more about LMS integration.
Note: To grant students access to your course content via LMS, they need to be invited or access Lt through an LMS deeplink. Once linked, courses appear on their Lt homepage.