How to update your LabTutor content, by moving it into Lt.
Here is our simple, step by step guide for moving your LabTutor lessons into Lt...
STEPS:
1. Getting started
2. How to copy text from LabTutor to Lt
3. How to add a popup
4. How to insert an image
5. How to create a new page
6. How to re-create questions
7. Data acquisition and settings files
8. How to add background information
9. How to add a report page
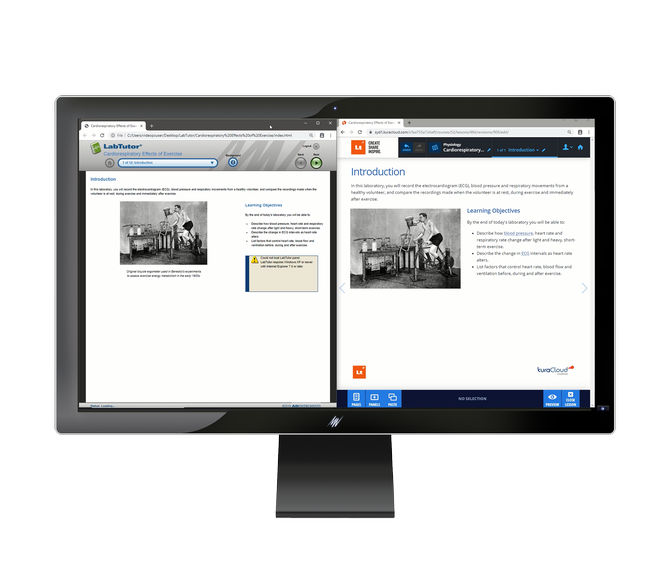
Getting started
Open the LabTutor folder containing the lesson that you want to convert. Here you will see the LabTutor Experiment file and a folder with the same name.
Within the folder, you’ll see folders for images, settings files, and the Instructors Material. You’ll also see a list of lesson pages. Open the first page of the lesson.
Next, you will need to log into Lt and select the course where you’ll create your lesson. Please note you will be adding example data to the lesson later on, so remember to change the course settings to allow this.
Add an access code (In the video example, we choose 0000.). Select lessons in the course card, and then select ‘New’ to create a new lesson. Now you can start the conversion! Select the pencil icons in the header to type in the name of the lesson and the page.
How to copy text from LabTutor to Lt
In LabTutor, there are Page Items - for example, a block of text, or an image - that correlate to Panels in Lt. But, in Lt, you can skip adding Page Items/panels by just dragging and dropping the content directly into Lt.
For example, to copy text over from LabTutor, highlight the relevant text, and drag the text straight into the Lt lesson. You can change the size of the heading text with the heading text buttons, and add bullet points, or numbered lists.
How to add a popup
To add a popup, highlight the word that you want to link to the popup and select the insert popup button. You have two options here:
- Smaller blocks of text can be copied into the summary popup box.
- Larger blocks of text and images can be copied into the full-screen popup window.
Please note you can rename the popup at the top of the screen.
To see how this displays for students, simply select Preview mode down the bottom of the page and test out your summary popup, and the full-screen pop-up. Once you have finished previewing your pop up, you can continue authoring by selecting Exit Preview.
How to insert an image
To insert an image, select the image from the relevant folder. Drag the image into the screen and release it over the cog icon that appears. Here you’ll be presented with different image options. Select one.
You can select and drag different panels to arrange them on the page, and resize them using the handles on the side of the panel. Copy the appropriate text into the image caption box to complete the page.
How to create a new page
To create a new page, select Pages, and then New page.
How to re-create questions
You will find the questions and associated answers in the Instructor’s Material. Highlight and drag your question over the page, and release it over the cog icon that appears.
Next, you’ll be presented with a range of question panels. Choose your panel type (for example, a text question). If you'd like students to be able to check their answer immediately, select Instant Feedback, then Set Answer, and enter your feedback. Select OK to exit the panel.
Alternatively, you may choose to change the question type to something a little more interactive. For instance, the example question could be turned into a multi-choice question. Add new answer choices by selecting add choice, or by pushing the enter key.
Data acquisition and settings files
First, open the .labdat file in LabChart 8, and save it as a settings file. If you have example data, then you can also export an example data file. From here, drag and drop the settings file into Lt.
For instance, to add example data to a Data Sampling panel:
- To add the example data, change the panel to Instant Feedback, select Set Answer, and find your example data file.
- Then, hit Done and change the panel back to No Assessment.
- To view the example data, enter Preview mode, hold down the shift button, select Start. Then select ‘Use Example Data’.
- Enter your access code.
- Your example data will now be displayed.
How to add background information
You can add background information by exiting Preview Mode and selecting the book icon at the top of the page.
How to add a report page
Finally, to add a report page at the end of the lesson, navigate to pages, and select create completion page. If you don’t want to show students a report, deselect ‘Show report’.
We hope that helps!
For more information visit adi.to/ltsupport
More information about transitioning from LabTutor to Lt
Why moving to Lt is the easiest way to update your LabTutor course
10 reasons why Prof. Andrew Subudhi at UCCS moved from LabTutor to Lt
How Kimberly Smith migrated her Bioscience course from LabTutor to Lt.
