

Thanks for your interest in the Myotatic Reflex protocol! Find the full protocol below. We hope it helps you in your teaching.
Teach your students a lesson they'll never forget with the myotatic reflex! Use this free protocol to have your students compare the joint angle and latency of the myotatic reflex under normal conditions and while performing the Jendrassik maneuver.
What is a reflex?
A reflex is an involuntary movement in response to a stimulus, occurring almost immediately after the stimulus.
What is the myotatic reflex?
The myotatic reflex is also known as the patellar reflex, patellar tendon reflex, or the knee-jerk reflex (knee jerk reflex).
People can develop a variety of central nervous system problems. Assessment of reflexes is an important part of the physical examination of a patient where a neurological disease is suspected. The knee reflex test is one of the most frequently performed neurological tests and is essential for identifying neuromuscular diseases (Salazar-Muñoz et al., 2019).
A monosynaptic stretch reflex
The myotatic reflex arc involves only two neurons, i.e. it is a monosynaptic reflex.
Within the reflex pathway, tapping the patellar ligament just below the patella stretches the quadriceps muscle. This stimulates sensory receptors in the muscle that trigger an impulse in a sensory axon. The sensory axon cell body lies in the dorsal root ganglion in the lumbar region of the spinal cord. The sensory axon synapses onto a motor neuron, which conducts the impulse to the quadriceps and triggers a contraction (the knee jerk reaction).
The myotatic reflex is a spinal reflex because the essential circuitry for this reflex is confined to the spinal cord; however, this information also passes to the brain.
Experimental Protocol
Here are the steps for setting up and running this classic experiment...
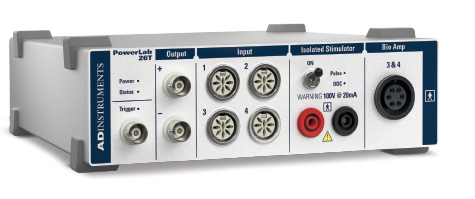
Using PowerLab (15T or 26T)
Related: Teach them a lesson they'll never forget! The Muscle Twitch Response experiment...
Step 1: Identify learning objectives
By the end of the activity students should be able to:
- Elicit the myotatic reflex.
- Describe the effect of the Jendrassik maneuver on the myotatic reflex.
Step 2: Set up your equipment to record signals
Hardware used:

PowerLab (15T or 26T)
This lab can be performed with any PowerLab with a minimum of two general inputs.

Electronic tendon hammer (DIN)
May be connected to a 8-pin Din (Pod) input channel of any PowerLab recording system, to provide triggering, timer, or marker signals.

Goniometer
Our electronic goniometers are bipolar joint angle sensors for single degree of freedom joints, e.g. the knee, and can be used with a tendon hammer for tendon jerk experiments.
Software used:

Lt
Lt is the only cloud-based learning solution that lets your students collect authentic data in the lab, with ready-to-use content for life sciences, chemistry, nursing, and medicine.
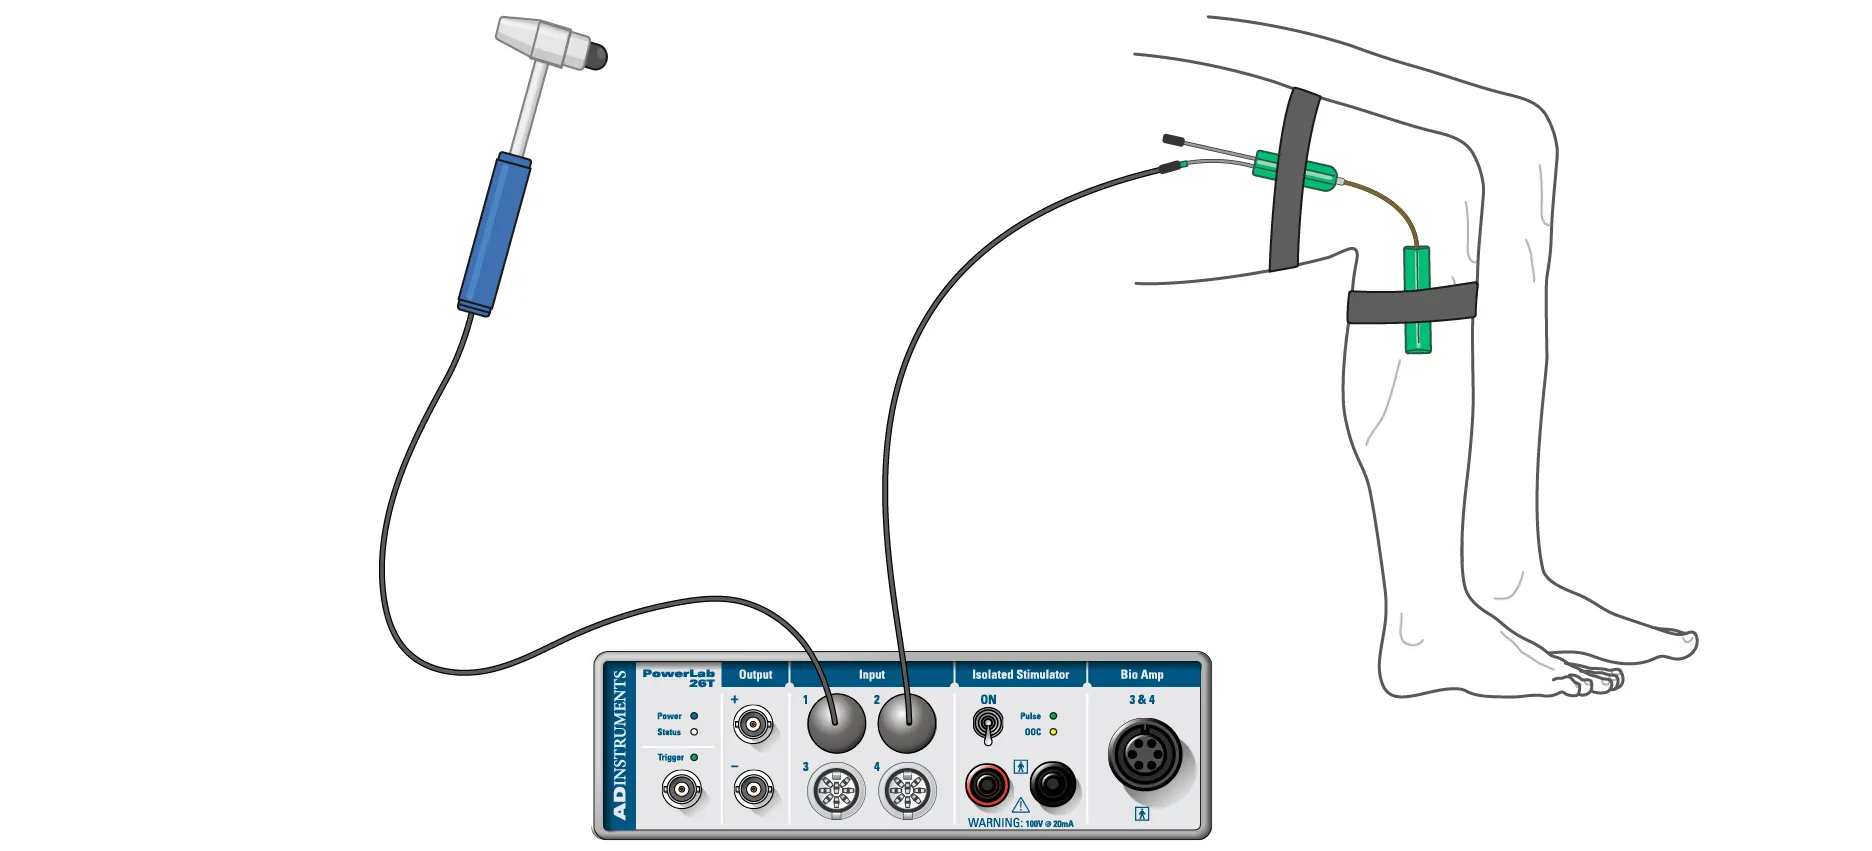
PowerLab, tendon hammer, and goniometer set up

You should be familiar with the relevant safety notes at the start of the hardware manual. The electronic tendon hammer and goniometer are perfectly safe when connected to Input 1 or Input 2 of a PowerLab. However, those inputs are not isolated and must not be used for direct electrical connection to human volunteers.
- Connect the tendon hammer to Input 1 on the PowerLab.
- Connect the x-axis input of the goniometer to Input 2 on the PowerLab.
- Note: The goniometer has cables for the x-axis and y-axis. For best results, the cables with the green marker (x-axis) should be connected to each other.
- Make sure the PowerLab is connected and turned on.
- Strap the goniometer to the lateral side of the volunteer’s right leg so that it is centered on the knee joint and adjust the straps so they are comfortably snug. The grey side of the goniometer should be in contact with the volunteer's leg.
Step 3: Elicit the myotatic reflex
The question here is: "How does the Jendrassik maneuver influence the range of motion for the myotatic reflex?"
Note: When you start to record data and deliver a tendon tap, there may be a delay of a few seconds before the data is displayed on the screen. This is normal and expected. When you stop recording, all of your data will be displayed.
Procedure
Ask the volunteer to sit in a chair and cross the leg with the goniometer attached over the other leg. Allow the foot to swing backward and forward freely. This can also be accomplished by placing a rolled-up towel beneath the target leg, as seen in the video.
With the tendon hammer, tap the patellar tendon just below the knee to elicit the myotatic, or knee-jerk, response. Practice this a few times so you are comfortable getting a reliable response.
- Select Start to record.
- A progress spinner will appear, but no data will be displayed until a signal in the Tendon Tap channel triggers a record to display.
- Use the tendon hammer to tap the patellar tendon of the volunteer.
- When you elicit a myotatic response, the goniometer should record a response in the Angle channel. Select Auto Scale if required.
- Repeat step 2 until you have 5 records of data.
- Select Stop.
- Ask the volunteer to perform the Jendrassik maneuver while sitting in the same position.
- While the volunteer performs this maneuver, select Start.
- Use the tendon hammer to tap the patellar tendon to elicit a myotatic reflex.
- Repeat step 7 until you have 5 new records of data.
- Select Stop.
- For each of the 5 responses recorded while performing the Jendrassik maneuver, enter "Jendrassik" into the Comment panel, and then select Add.
Note: If your tendon tap did not elicit a response, you can select the settings icon, then select Remove or Hide to remove the active record.
You will record two channels of data in Lt across 10 records, which will look like this:
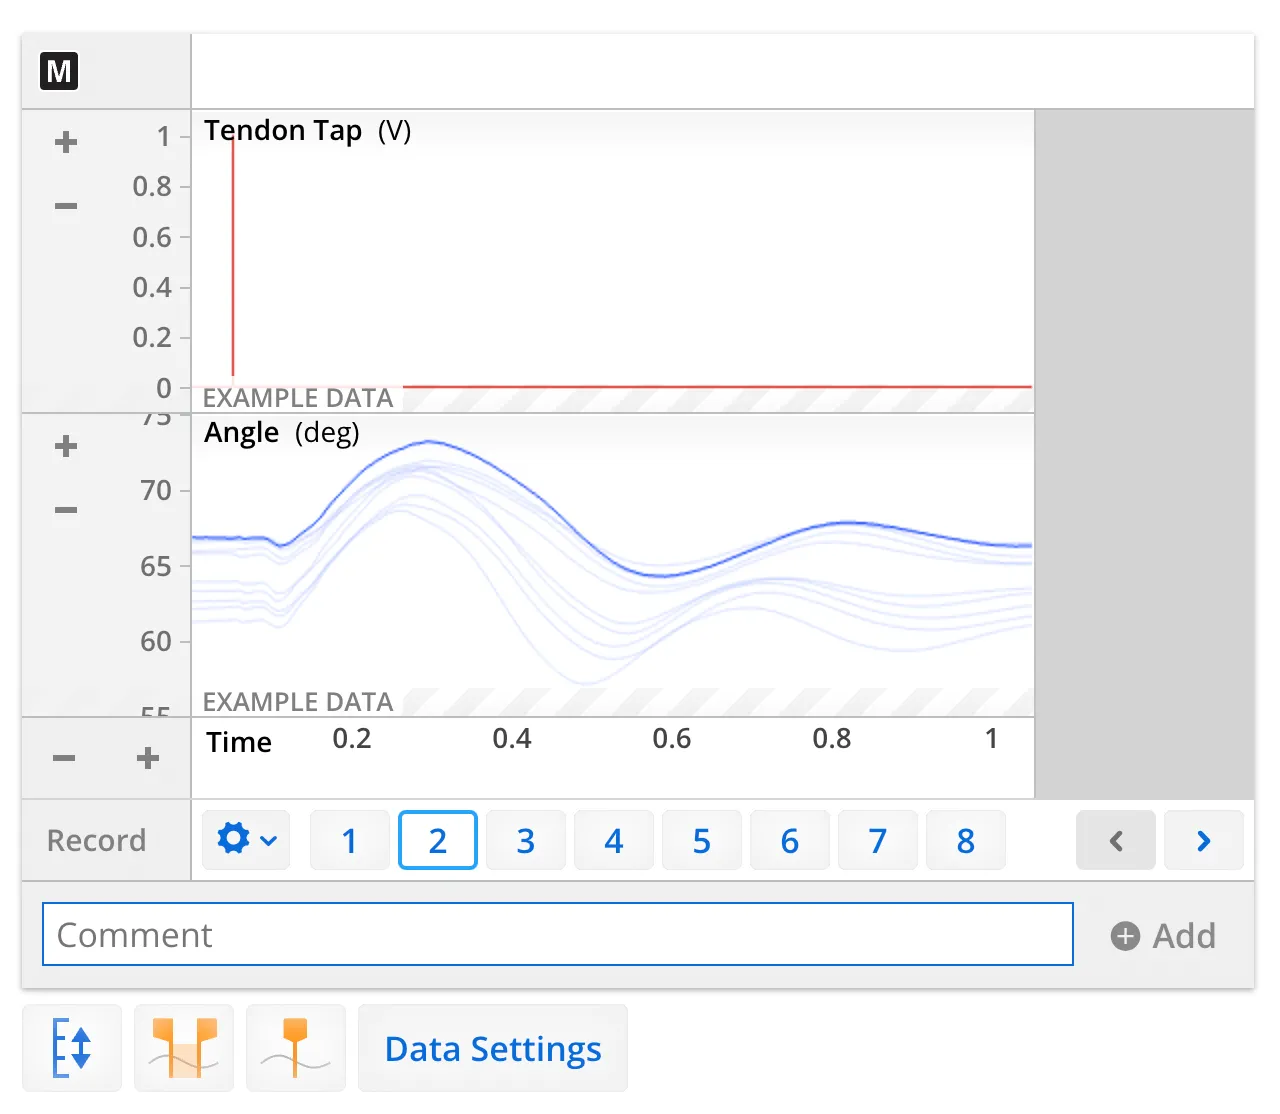
Example data in the Myotatic Reflex Mini Lab in Lt.
Step 4: Analysis
In this analysis you will compare the joint angle and latency of the myotatic reflex under normal conditions and while performing the Jendrassik maneuver.
Procedure
- Use Auto Scale or the compression buttons to view the first record performed under normal conditions.
Latency
- Place the Marker at the start of the tendon tap in the Tendon Tap channel.
- Position the Point Selector at the beginning of the muscle contraction. The change in time (∆ Time) will be displayed in the Value Panel.
- Enter this value into the "Latency – Normal" column of the table.
| Latency - Normal (ms) | Angle - Normal (°) | Latency - Jendrassik (ms) | Angle - Jendrassik (°) | |
|---|---|---|---|---|
| Record 1 | 66 | |||
| Record 2 | 61 | |||
| Record 3 | 63.5 | |||
| Record 4 | 65.44 | |||
| Record 5 | 65.075 | |||
| Mean | ||||
| SD |
Amplitude
- Place the Marker on the baseline of the Angle channel.
- Position the Point Selector on the peak of the response. The change in angle (∆ Angle) will be displayed in the Value Panel.
- Enter the ∆ Angle value into the appropriate column of the table.
- Repeat this procedure for each record, across both normal conditions and with the Jendrassik maneuver.
The mean and standard deviations (SD) will be calculated for you in Lt.
| Latency - Normal (ms) | Angle - Normal (°) | Latency - Jendrassik (ms) | Angle - Jendrassik (°) | |
|---|---|---|---|---|
| Record 1 | 66 | 71.5125 | ||
| Record 2 | 61 | 73.165 | ||
| Record 3 | 63.5 | 71.92 | ||
| Record 4 | 65.44 | 71.5875 | ||
| Record 5 | 65.075 | 71.2675 | ||
| Mean | 64.20 | 71.89 | ||
| SD | 2.02 | 0.75 |
The data collected can then be used to generate charts in Lt.

Example data comparing the latency and amplitude of the knee-jerk reflex with and without the Jendrassik maneuver summarized in graph panels in Lt.
Step 5: Check your understanding
This is a chance for students to reflect on their data recordings. Check students’ understanding by asking questions such as:
Question: What effect does the Jendrassik maneuver have on the myotatic reflex?
Answer:
Generally, the amplitude of the myotatic reflex should increase when your volunteer performs the Jendrassik maneuver. However, the latency should be relatively unchanged between the two conditions.
Question: What does the effect of the Jendrassik maneuver indicate about the neural pathways involved in the myotatic reflex?
Answer:
The Jendrassik maneuver increases the amplitude of the myotatic reflex response by decreasing inhibition of the reflex. This indicates that the brain normally sends inhibitory messages to lower tendon reflexes. The Jendrassik maneuver can also help to reduce your volunteer's conscious inhibition of the reflex.
You can find more "Check Your Understanding" questions in the full lab, available in Lt.
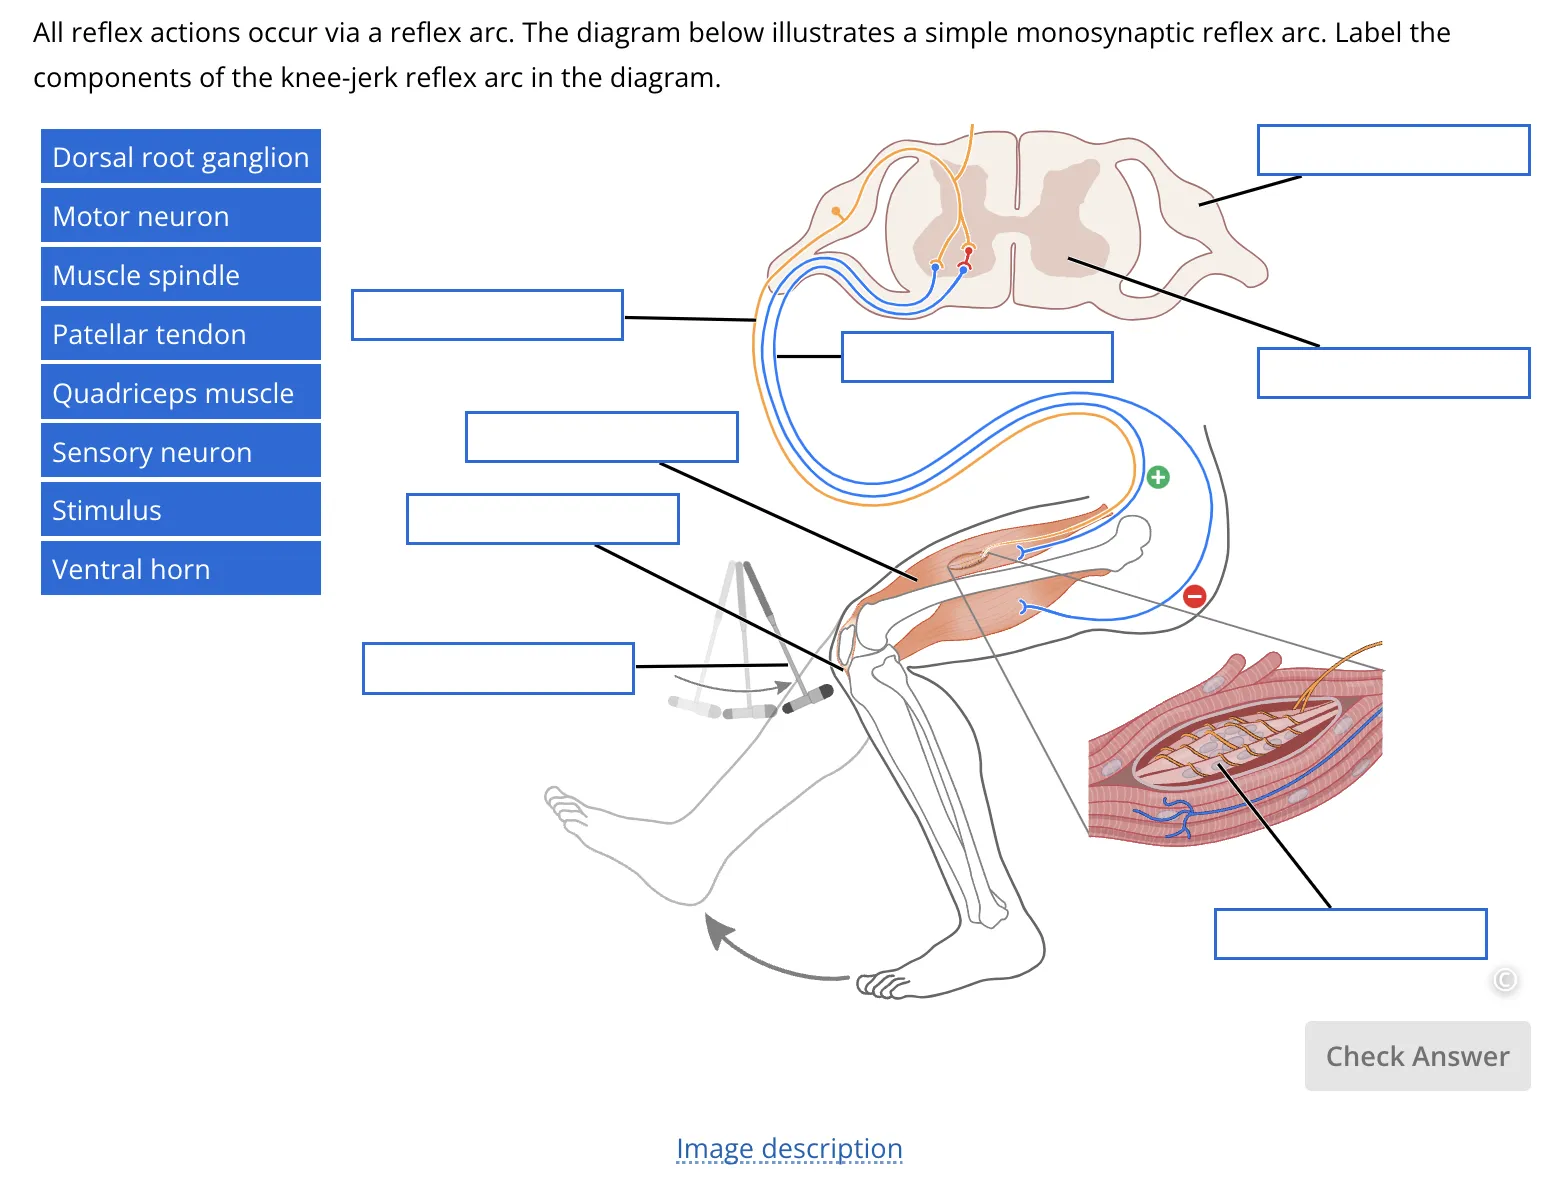
An interactive, drag-and-drop question in Lt that shows the components of the myotatic reflex.
Flexible Teaching
This is a short lab with just one activity. We have designed it this way to allow flexible use of the lab. It could be used as a stand-alone activity, or be combined with other related labs such as the Hoffmann’s Reflex or Skeletal Muscle Function labs, found in the Lt Human Physiology Collection.