LabChart Lightning aims to provide increased flexibility over how users can organize and interact with their recorded data. In this video, we will cover the various ways to display your signals in LabChart Lightning.
Choosing which signals to display
In a new recording, LabChart Lightning places each of the connected device’s recorded inputs into their own channel.
This is only the default assignment. To make better use of the available screen area or allow easier visual comparison between signals, we can add any signal into a channel by accessing a channel’s properties:
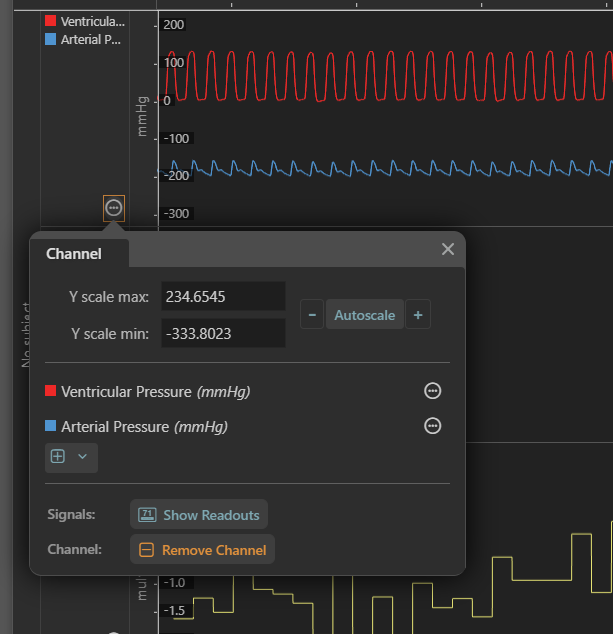
From Channel properties, signals can also be removed. It is important to note that doing so does not remove the signal from the recording. Even if a signal is not visible in the Chart view, it can still be used in subsequent analysis in just the same way as visible signals.
Overlaying signals
LabChart Lightning provides a convenient way to move signals between channels. Simply pick up the signal and drag it into the desired channel.
If you have any questions not covered in this video or our other support material, please feel free to contact your nearest support representative - we’d be happy to help!
Enjoy!
The LabChart Team