Settings files allow you to apply predefined channel and sampling configurations to Data Sampling and Scope Sampling Panels in Lt. These files save time and ensure consistency by setting up your sampling panels for specific applications.
Lt provides a range of built-in presets tailored to various data sampling scenarios, as well as the option to upload custom settings files created in LabChart (v8.1.2 or later).
Available Preset Settings Files
Data Sampling Presets:
- Default Settings
- 2-channel EMG
- Blood Pressure and Cardio Microphone
- Breathing
- ECG and Heart Rate
- ECG, PCG, and Pulse
- Pulse and Heart Rate
- Spirometry Flow and Volume
Scope Sampling Presets:
Note: In addition to these presets, you can create and upload custom settings files using LabChart. This feature is particularly useful for advanced or specialized experimental setups.
How to Apply a Settings File
Follow these steps to apply a settings file to your Data Sampling or Scope Sampling Panel:
- Open your lesson in Edit mode and select the Data Sampling or Scope Sampling Panel you want to configure. Then, click Edit.
Click the Settings button in the footer. From the menu, choose one of the built-in presets or click Upload Settings File to apply your custom file.
Image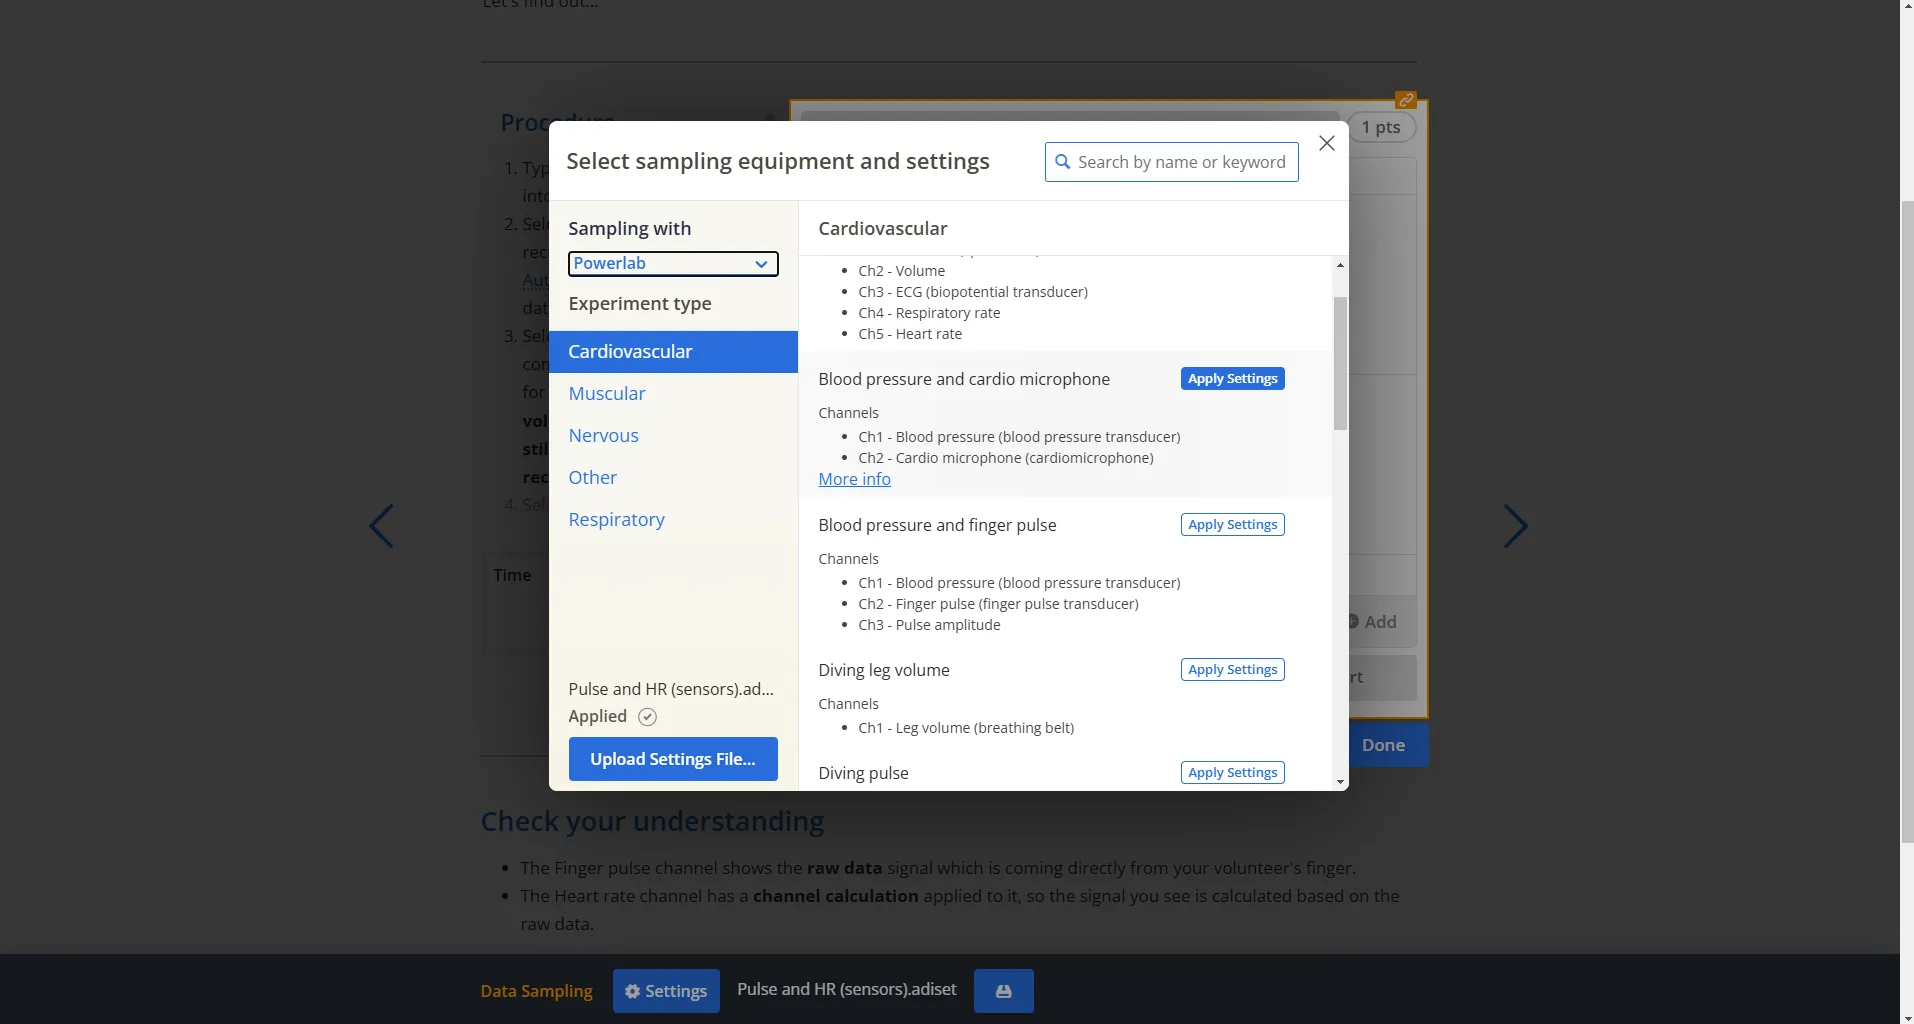
Fig. 1: Accessing the Settings Menu
- Ensure you have selected the correct sampling instrument, such as Lt Sensors or PowerLab, depending on your setup.
- Click Apply Settings and close the modal to save the configuration.
- Once the settings are applied, click Done to exit the Edit mode.
What to Expect After Applying Settings
The panel will automatically adjust to reflect the applied settings. Any changes to sampling rate, channel configuration, or input settings will be visible in the panel. Ensure the settings align with your intended experimental design.