This default setting is available for the Scope Sampling panel. It is a general purpose settings file of 500 ms duration. Scope averaging has not been applied in this file. The Isolated Stimulator is set to be ON with a starting current of 0 mA. This settings file can be used to record an evoked electromyogram (EMG) from a human volunteer.
To use this file, ensure you have a PowerLab attached to your computer. You will also need an Isolated Stimulator and a Bio Amp (Input 3) connected to your PowerLab. Note that PowerLabs 26T and 15T both have an inbuilt Isolated Stimulator and a dual Bio Amp, which is connected to PowerLab Inputs 3 & 4.
Before you make a recording, drag a Stimulator panel onto your page in Lt. It should recognize the Stimulator settings in your Scope sampling panel. Select Preview and select a suitable starting current (5–15 mA). When you select Start you should see a stimulus marker in the Stimulus channel (see figure).
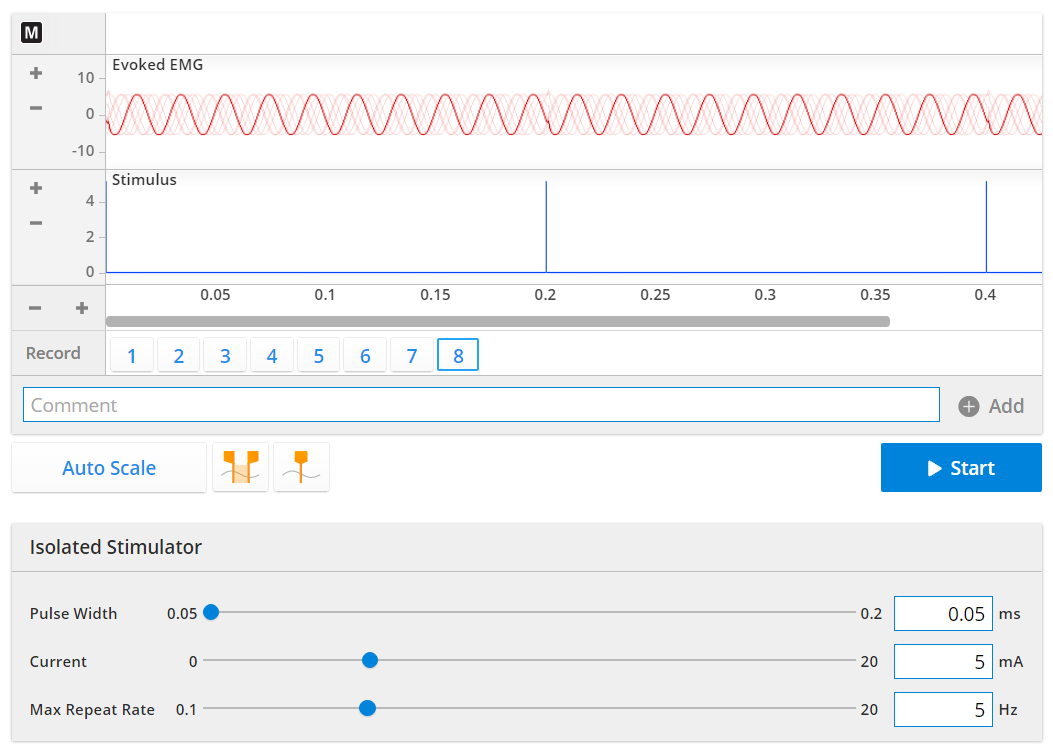
The Stimulator panel should recognize the Stimulator settings in your Scope sampling panel. Note the stimulus marker in the Stimulus channel.
Suggested equipment setup for an evoked EMG recording from the thumb:
- Make sure the PowerLab is connected to your computer and turned on.
- Remove any watches or jewelry from your wrists.
- Connect the electrode lead wires to Earth, CH1 NEG, and CH1 POS on the Bio Amp cable.
- Plug the Bio Amp cable into the Bio Amp input. (If you are using a Bio Amp front-end, connect the front-end to Input 3 on your PowerLab.)
- Lightly mark two small crosses on the skin above the abductor pollicis brevis muscle, mimicking the position of the recording electrodes shown in the figure below. The crosses should be 2–3 cm apart.
- Lightly abrade the marked skin to reduce its electrical resistance.
- Obtain two new disposable ECG electrodes and trim the adhesive pads slightly so they will fit as shown in the figure.
- Place the electrodes onto the skin over the crosses so they adhere well. To reduce electrode movement, use adhesive tape to attach the wires to the skin close to the electrode.
- Snap the lead wires from CH1 on the Bio Amp cable onto the electrodes.
- Check that the two electrodes and the dry earth strap are properly connected to the volunteer and to the Bio Amp cable before proceeding.
- Connect the stimulating bar electrode to the Isolated Stimulator output of the PowerLab: the red (positive) connector to the red output and the black (negative) connector to the black output.
- Place a small amount of electrode cream on the two silver pads of the stimulating bar.
- Place the stimulus electrode over the volunteer's median nerve at the wrist (the approximate placing is shown in the figure).
- Turn the Isolated Stimulator switch ON. The Isolated Stimulator only becomes active during a recording. It is switched off internally at all other times. (If your PowerLab does not have an inbuilt Isolated Stimulator, you can connect an Isolated Stimulator front-end to your PowerLab.)
- The dot on the back of the stimulating bar electrode indicates the positive electrode. Secure the electrode as shown in the figure, with the positive electrode closer to the elbow.
