Beginners Guide to using Lt
Follow these six simple steps and begin teaching your students online quickly and easily.
Step 1
Import existing Lt content
There are many pre-made Lt lessons available already!
Step 2
Add your own content to Lt
Shifting your content into Lt is as simple as drag and drop!
Step 3
Customize your content in Lt
All content in Lt is fully customizable, so you can merge existing content with your own to make the lessons you need.
Step 4
Make use of existing data
If students aren’t able to access the lab, they can still access data.
Step 5
Invite students to Lt
It’s as easy as importing a class list.
Step 6
Publish and make content available
Whether to showcase to staff or to distribute to students, you choose what is seen.
Help Guides
Lt Essentials
Signing up to Lt as an educator
You will learn how to accept your invitation to Lt and the basics of the administrator interface.
Lt Instance Administration
You will learn how to customize your Lt instance by modifying the general settings, inviting administrators, and creating or modifying staff roles.
Staff can check the status of kuraCloud and sign up for important notifications about the platform here.
Setting up a course
You will learn how to create new courses, modify their settings (including grading workflow and example data options), and invite course-specific staff members.
Adding content to your course
The Getting Started Lessons
These lessons provide an introduction to Lt for educators and students. Make sure you add the Lt Student Starter module to all student courses.

How to teach an online lab in Lt
How to switch example data on by default
Transitioning your content into Lt
See how easy it is to move your content from Microsoft Office(Word, Excel, Powerpoint) Google Drive and LabChart into Lt.
Inviting students to Lt
You will learn how to add and remove students from your course (individually or in bulk), edit their details, manage student sections, and send invitation emails.
Support Article: Importing Students into Lt
Example .csv file for importing students
Student Admin Resource Pack
- Lesson checklist - pre-release to students
This checklist will help you make sure your lessons are ready for students. - Lt student pre-invitation template
A template for a quick introductory email to your students, explaining what Lt is and how to sign up. We strongly recommend sending this email out before you invite students to your course. - Lt student invitation template
This template is formatted in a way that allows you to import students to Lt. See our Support Article here: Importing Students into Lt - Student experience - login and exploration
An introductory video for students. You may want to share this video with your students at the same time you invite them.
Managing sections in Lt
Here's a feature that lets you manage the sections in your course in a flexible and intuitive way.
Publishing a lesson
You will learn how to publish lessons and modules, and how to make them available to students.
Publishing a module
Support Article: Publishing a Module in Lt
If you update a lesson and then publish it, only students who have not yet started the lesson will see the updates. Students who have already started the lesson will continue to see the old version. Therefore, before publishing a lesson, be certain it is the final version. If you want to make all students see the latest version, you’ll need to reset the progress of those that have already started the original version. This is a critical process that can’t be undone, so do so with consideration.
Publishing checklist
See here for a more in-depth checklist before publishing and making content available to students. Some key points to note are:
- The content is up-to-date and ready to be accessed by students
- You’ve decided if the lesson will be published individually or in a module
- The lesson has a poster (thumbnail) icon
- Once published, the lesson is available to students at the correct date(s) and time(s).
- I’ve selected ‘Student View’ and can see the content I expected is available to the students.
Before publishing content, consider if the content is best published as a stand-alone lesson or as one of a series of related lessons in a module. For example, a lesson introducing the course would likely be best published by as a stand-alone lesson. However, a pre-lab quiz lesson that precedes an associated lab would be best published within a module.
Note: It’s very important to only publish a lesson either individually or within a module. If a lesson is published both as an individual lesson and a lesson within a module, students can start and complete them separately.
Enhance your teaching
Editing Lt lessons
You will learn how to accept your invitation to Lt and the basics of the administrator interface.
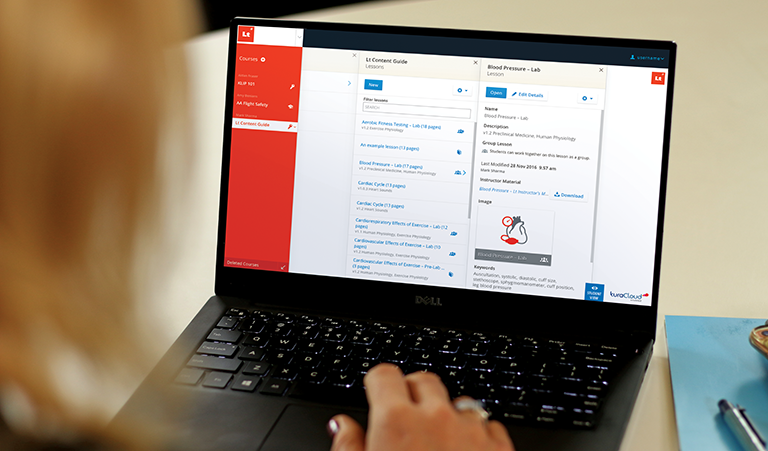
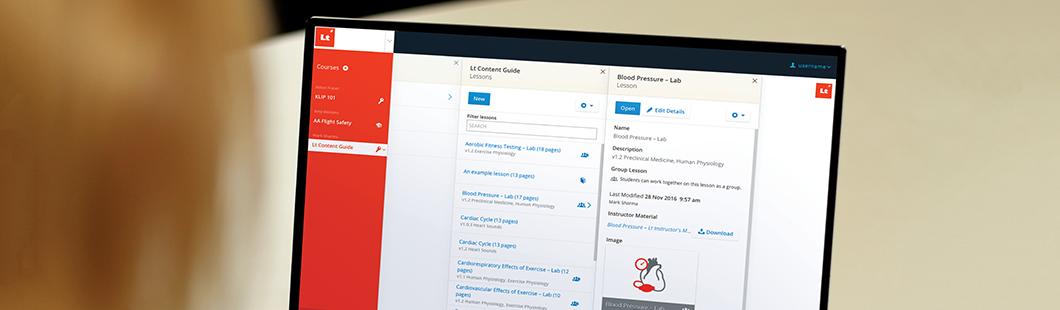
Editing Lt lesson details
You will learn how to change the details of a lesson, including its name, description, key words, lesson icon, and more. This video also addresses how to activate Group and Presentation Lesson options, and explores lesson revisions.
Creating Lt Lessons
You will learn how to create lessons from scratch in Lt. Happy authoring!
Adding videos to a lesson
Support Article: Creating Lt Video Panels
Transitioning your content into Lt
See how easy it is to move your content from Microsoft Office(Word, Excel, Powerpoint) Google Drive and LabChart into Lt.
Using the Lt student progress dashboard
Learn how to use the student progress dashboard in Lt to gain insights about your students and lessons.
Resetting student progress in Lt
Support Article: Resetting student progress in Lt
Granting students extensions in Lt
Support Article: Granting Extensions in Lt
Grading in Lt
You will learn how to “force commit” student work and navigate the Grading Interface.
Basics of Lt for students
You will learn how to accept your invitation to Lt and navigate the student interface. This video teaches you everything you need to know to start learning in Lt!
FAQ
- Transitioning your content into Lt
Resources for authoring:
- Use sections for students in the same course: Managing sections in Lt
- Alternatively, set up separate courses: Setting up an Lt Course
Yes, though you can use .csv files to quickly invite your students or transfer grades to your LMS, and then set up integration later.
If you'd like to integrate right away, see our page on LMS Integration.